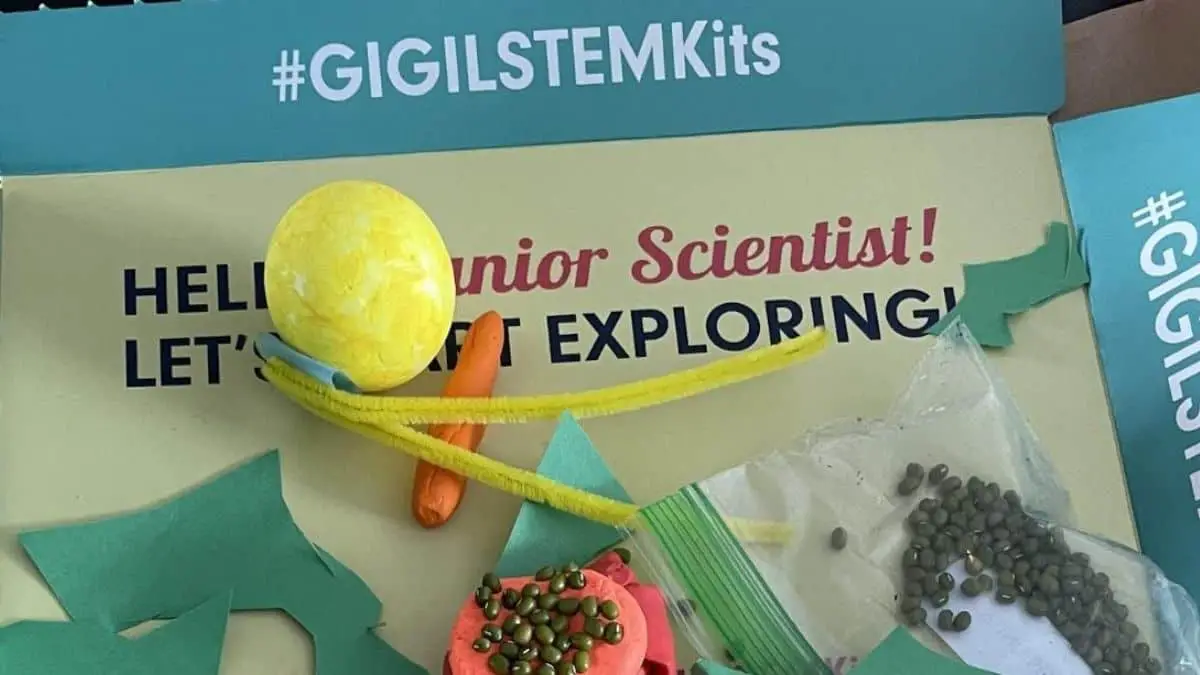
GIGIL Box Review — Let It Grow, Let It Grow!
The GIGIL Let It Grow experiment box is a well-designed set of experiments centered on plants and ecosystems. The kit includes five activities and experiments that do a nice job illustrating scientific concepts and experimental approaches. I reviewed the box aimed at pre-k to first grade with my pre-k daughter. We had a great time learning about salt flats, starting seeds, and making mini greenhouses!
Our box included five activities and experiments:
- Salt Flats
- Build an Ecosystem
- Caffeine Plant Growth
- Paper Plate Greenhouse
- Photosynthesis Model
All of the activities and experiments help illustrate different concepts related to ecosystems, growing plants, and photosynthesis.
GIGIL has included some really nice design features that make it a great choice for those searching for a high-quality science kit delivered to their home.
The GIGIL Let It Grow box includes everything you will need to conduct several fun, classic seed-starting experiments, as well as some related activities highlighting the importance of solar radiation and photosynthesis.
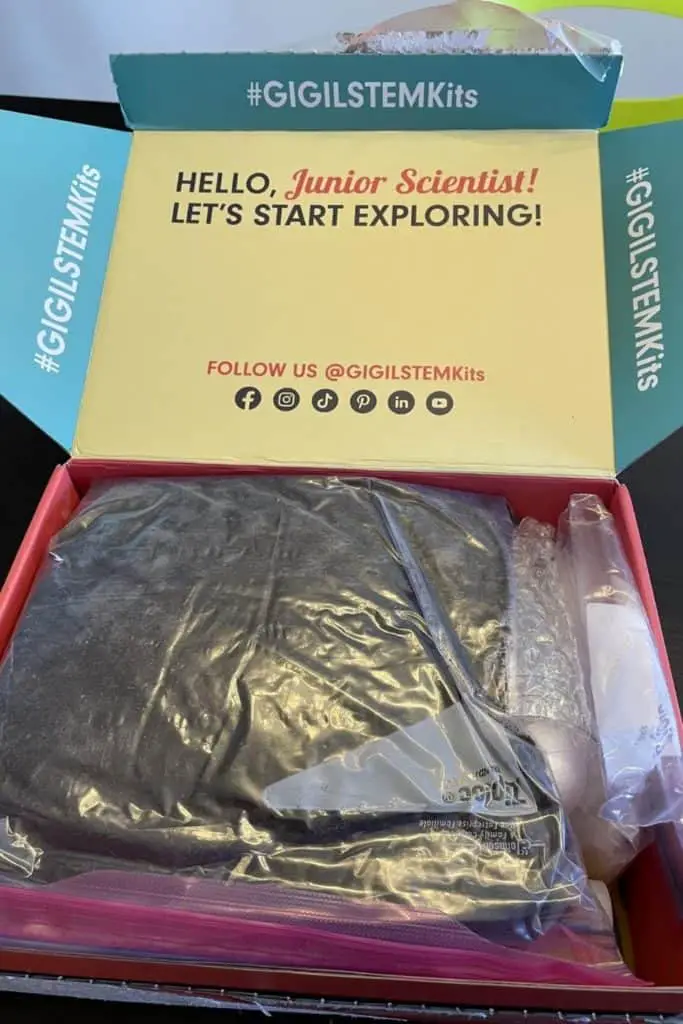
What’s In The Box?
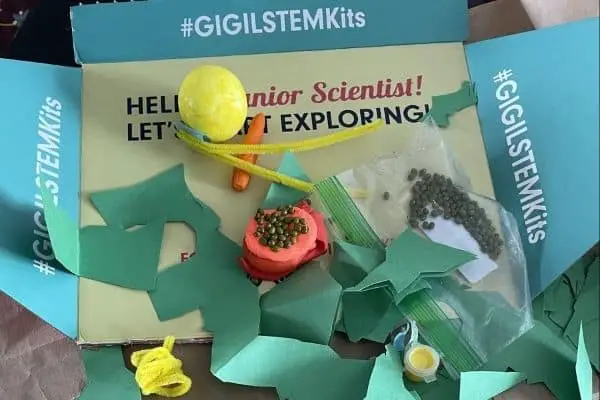
In the box, you will find all of the equipment and ingredients required for each of the four experiments and one activity – no shopping required!
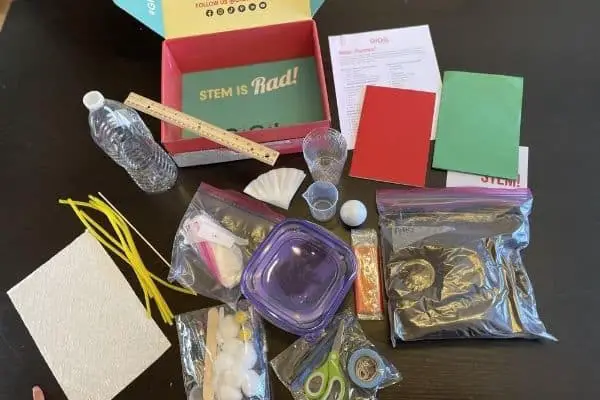
In this box, you’ll find:
- Soil
- Salt
- Baking soda
- Mung bean seeds
- Lima bean seeds
- Growth enhancers (coffee and xxx)
- Scissors (nice ones!)
- A pen and pencil
- A ruler
- And all materials required to complete each experiment (e.g., planting containers, spoon, plastic baggies, and more)
- A blank notebook to record your results and observations
It was so convenient to have every item required for the experiments included in the kit. All five experiments use easy-to-find materials, however, it’s nice to know that you won’t have to hunt anything down or wait until you have a chance to shop if you happen to be missing anything on the list. I also appreciated that the materials came in high-quality resealable plastic bags. I am a big plastic baggie re-user, and I love that I can re-use the packaging easily, rather than throwing away the plastic wrap. This also means that there is no extra packing material, making it a relatively low-waste box, and a feature that I truly appreciate!
Design
The experiments are nicely designed with clear, simple instructions. The salt flat experiment has a wonderful instructional video that provides great background information and interesting visuals.
Instructions
The instructions are clear, brief, and easy to follow. The first experiment in our box was the salt flats experiment, which includes the online video. This gives a nice introduction to the box and starts things off with a really positive feel. The rest of the experiments are simple and appropriate for a child to complete with minimal guidance (depending on age, of course). My four-year-old was able to do most of the actual assembly on her own with my instructions and occasional guidance to show her something the first time.
The last activity, creating a model of photosynthesis, has very basic instructions leaving for an open-ended interpretation of the task. I see this as a positive on the whole, but parents or teachers may want to do a little independent research (5-10 minutes online should do it) to help their child or student with some of the details.
Experiments
Each experiment took between 10-20 minutes to start (for me and my 4-year-old). There is one that requires soaking seeds overnight, and then each experiment takes time to allow seeds to sprout and grow. The waiting can definitely be a challenge, but that process and the results that follow are all part of the scientific process.
Real-life experiments take time to mature, so it’s great practice and I love that these are true experiments, where you are instructed to use different approaches to find out what method works best. I will say the instructions are more basic than those I have encountered before, but they are still high-quality and easy to follow.
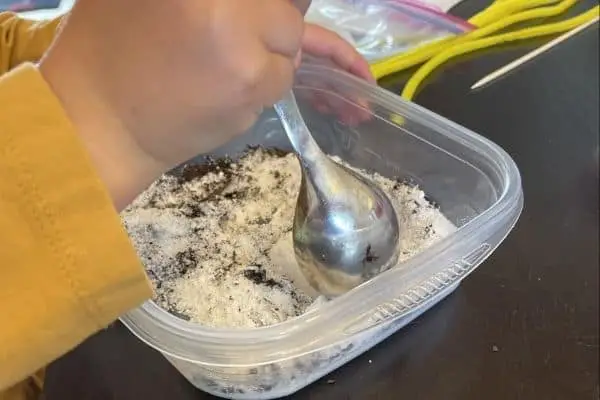
Experiment 1: Salt Flats
Salt flats is a really cool feature out here in the West, and something we may take for granted when we see them. I really loved the intro video that came with this experiment: it was age-appropriate, informative, well-produced, and gave some really nice illustrative examples of both the real thing and the results possible with this experiment.
Putting it all together was simple and fun – just stir together salt, baking soda, and some soil then sit it in a sunny spot! My biggest challenge, honestly, is that I live high in the mountains and it was a somewhat cold week (we had the first snow day in years a few days after putting the salt flat experiment together), so our salt flat came out a bit, well, flat! At least compared with some of the more exciting examples from the video. In all, I would call it a success, and it was so easy to do that I may try again when things warm up, just to see how it goes with more heat and direct sun.
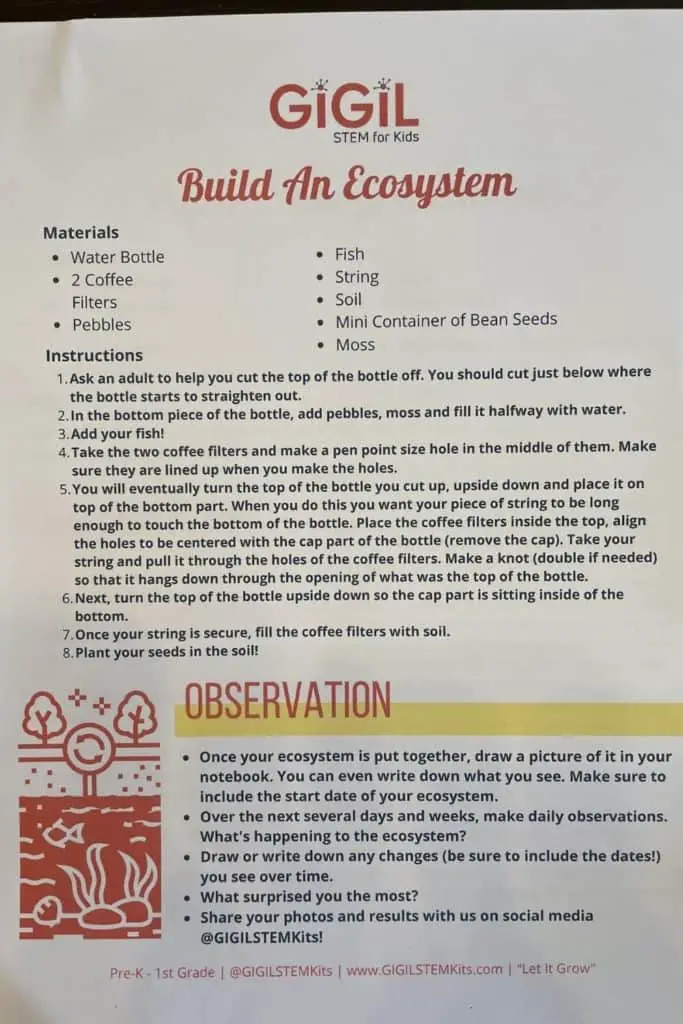
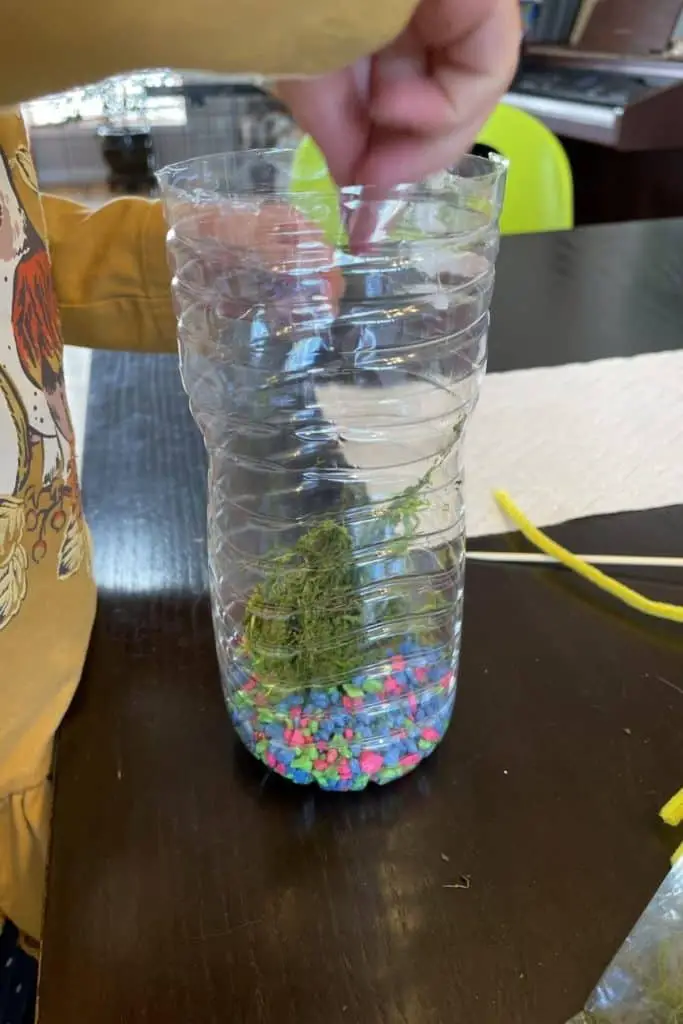
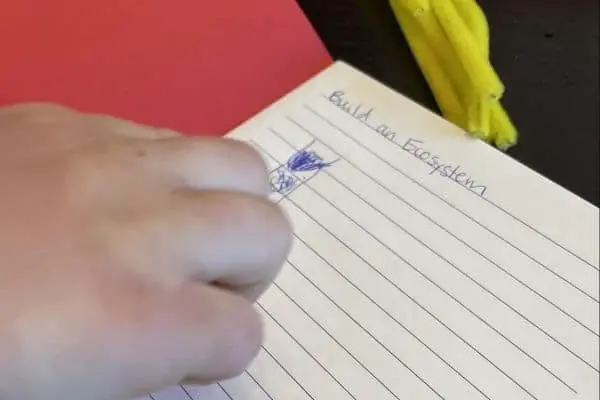
Experiment 2: Build an Ecosystem
An ecosystem is a pretty complex concept for a young child. It’s something that we see and feel when we are out in nature, but describing how all of these things truly work together can be difficult without getting too mired in complex details.
This experiment uses a plastic water bottle to create a small, self-contained ecosystem with soil, water, moss, mung bean seeds, and even a (fake) fish to illustrate how we are all connected. It’s a lovely, simple illustration showing how the elements of a natural system are connected and work together.
My daughter was able to assemble most of the mini ecosystem with minimal help from me, and she really made the connections, which was fun to see. I am looking forward to watching it mature as the mung beans begin to grow! With a cold week following our plantings, the seeds have been slow to sprout but that is all part of the puzzle as well. And certainly an opportunity for learning
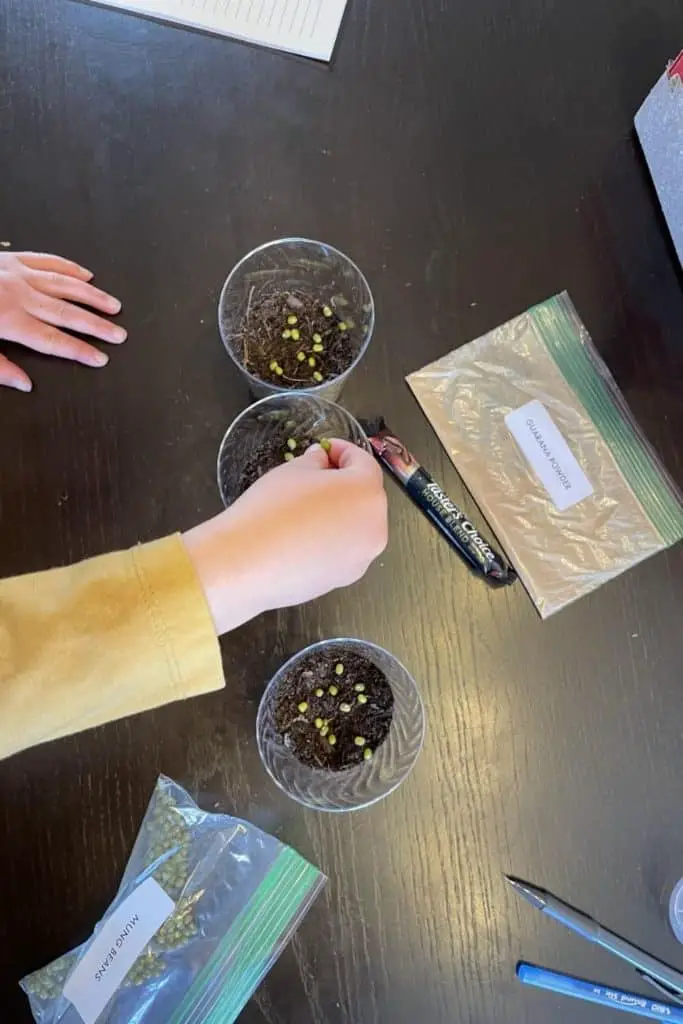
Experiment 3: Caffeine Plant Growth
Caffeine gives you energy, right? Is the same true for plants?
This is a great question and an excellent experiment to understand how nutrients affect plants (and by extension people and animals).
The elegantly designed experiment uses instant coffee and guayana powder as two supplemental nutrient sources to understand how plants respond to different inputs. Again, the experimental design is satisfyingly simple, using three plastic cups filled with soil and mung beans to test the nutrient additions. I love that it is a true experiment: testing two substances plus a control to investigate what works best.
The experiment is easy to assemble and track, making it really approachable for kids of all ages. At the same time, it illustrates some pretty complex scientific ideas like experimental design and plant-nutrient interactions. I really appreciate this type of experiment, as it gives kids a chance to meet the project on their own level, and introduces added levels of complexity as they are ready for them. The simplicity also means you can repeat the experiment if needed (something I may need to do, as our growing conditions have not been ideal, so we may try again when actual spring arrives in our neck of the woods).
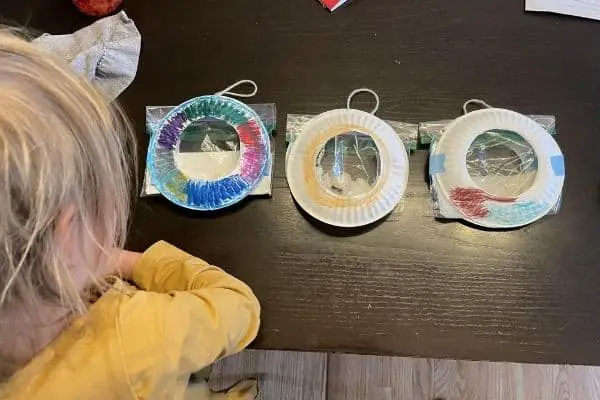
Experiment 4: Paper Plate Greenhouses
This classic experiment uses Lima beans to test three different media for sprouting beans. Like the caffeine experiment, I love that it is a true experiment testing three different growth media – wet paper towel, wet cotton balls, and a wet piece of paper – to see what helps the beans sprout fastest.
The full activity includes creating little greenhouse windows with paper plates and plastic baggies, then hanging them in a sunny spot. We took the liberty of also decorating the paper plates, which gave our beans a little extra soaking time and made for a fun and bright end result.
We really enjoyed putting this one together and finding a good spot for the greenhouses to live. Like the other experiments, the materials are simple and easy to find, and it’s so quick to put together the experiment that you may find yourself looking to repeat it with other beans, different media, or even using growth enhancers like caffeine for future experiments. For me, the sign of a successful lesson like this is when I find myself thinking of all the ways I could expand on it for the next time!
Experiment 5: Photosynthesis Model
Adding a craft element to a science box is always good in my book. I think that learning is best when it integrates multiple approaches. Some kids are more creative, some like using their hands, and some do well with visual models. Science can often feel a bit clinical, so whenever it brings in a more creative and colorful element, I’m a fan.
This activity uses a variety of provided materials and invites you to create a model of photosynthesis including soil, water, plant, clouds, and sun. Being 4, my daughter’s model was a bit more free-form than one might expect, but it had the elements there, and she certainly enjoyed herself! I think that, especially for the box aimed at younger children, this activity would have benefited from a bit more direction.
The instructions invite you to create a model of photosynthesis using the materials provided (which are listed). There is a small diagram, which is helpful, and I do appreciate an open-ended activity. But I think we might have had some better success with a few more road signs on this one.
What I Would Improve
I see a bit of room for improvement in the background information for the experiments and instructions for the photosynthesis model. What is there is clear, accurate, easy to follow, and well-designed, so no complaints about the quality of what is provided. However, except for the video that accompanies the salt flats experiment, the directions don’t really provide any background information about the purpose of the experiments. While I definitely appreciate allowing the work to speak for itself, I think that a few sentences about why we might conduct this experiment could enhance the experience.
As I mentioned earlier regarding the photosynthesis model activity, it was a little unclear to me what the materials were intended to represent and we didn’t have great success creating something that looks like a model. We did discuss photosynthesis, and being my daughter (I studied plants, pretty specifically photosynthesis), my daughter is used to this from me. So from that point of view we did learn the important details, we just didn’t really make something that looks like them!
I think would have loved to see a photo gallery with some examples of completed models – these could be very different from each other to help illustrate a range of options – and/or a roadmap detailing what each material included for the model is best suited to represent. I love that it is not a prescriptive activity, instructing children to make something identical, but a little bit of a boundary could go a long way here.
Features
The features of this box are the really genuine experimental approach and the introduction to complex ideas about ecological principals that are introduced.
True Experimental Designs
Often the things we call experiments when teaching science are actually demonstrations: we illustrate a scientific principal or process and call that an experiment. To me, a true experiment is one in which you test a hypothesis using different approaches and evaluating the results. This box really delivers on that front using experimental designs that are very approachable for young children. The experiments are hands-on, yet very simple to assemble, but the invitations to form a hypothesis and conduct an experiment are the true foundation of experimental science. The kit includes a blank notebook and each activity or experiment encourages your child to write down their hypothesis and then track results over time. I love this feature, I love that it has minimal direction and my daughter and I had fun filling it in together. The experimental scientist in me could not avoid setting up tables to record results, and my daughter drew a small diagram of each experiment once it was assembled. I fully plan to pull it out and continue tracking our results over time.
Working Toward Complex Ideas
Each of the experiments and activities in this box work together to illustrate different parts of our ecosystems and highlight the connections between sunlight, water, seeds, soil, etc. By including all 5 in a single box, kids will begin to connect the dots between the different elements introduced, and hopefully gain an understanding of basic ecology, which is to say the way everything is connected.
I like that the ideas are there for you to interpret and not forced, as that allows your little scientist to find and make those connections independently. This box really lays the foundation for ongoing scientific discovery by encouraging your child to ask questions and pay attention to the world around them. Truly, this is one of the most important things we can teach in any subject, and is a pillar of the scientific process.
Verdict
The GIGIL Let it Grow box is great fun! Both my daughter and I really enjoyed completing it.
Pros
Cons
Ratings
Our ratings for each of the following out of 10:
- Design — 9
- Features — 9
- Educational Value — 10
- User Experience — 8
- Value for Money — 9
Frequently Asked Questions
Are the experiments safe?
Yes! It’s always important to keep materials like soil or salt out of your eyes, but everything used in this box can be found around the house and there is no concern about touching or playing with any of it.
What age is it designed for?
This experiment is great for all ages. Our box was designed for children as young as pre-K, but the activities and experiments can easily be toned up or down to meet your child or student where they are.
Do I need special growing equipment?
Not at all! If you have a window that gets some light, you should be set to go. Of course, if your house is very cold (like mine was the week we did the box) or you don’t get much light, your seeds may take more time to germinate and grow. That could be part of a future experiment: which window is best for growing plants in my house?


