Top 9 Simple Summer Science Projects to Do With Your Kids [Fun and Easy!]
Still searching for fun summer activities to fill up those free days?
You are not alone!
Warm summer days ahead are set to give way to unhealthy screentime habits, especially for elementary and middle schoolers. Being a parent (AND educator!) myself, I’m well aware how a balance between play and active learning plays an important role in productivity and success in general.
While holidays are predominantly meant to be breaks from school work, these summer science projects creatively transform learning into something fun. Especially because (or even though–take your pick!) they mostly teach physics, chemistry, and general problem solving.
They are also a good way to bond with them over the holidays while flexing those brain muscles.
Related post: Summer Engineering Projects for Kids & Adults – 5 Ideas for All Skill Levels [Easy and Cheap!]
#1. Little-Guy Helicopter [Fluid Flow]
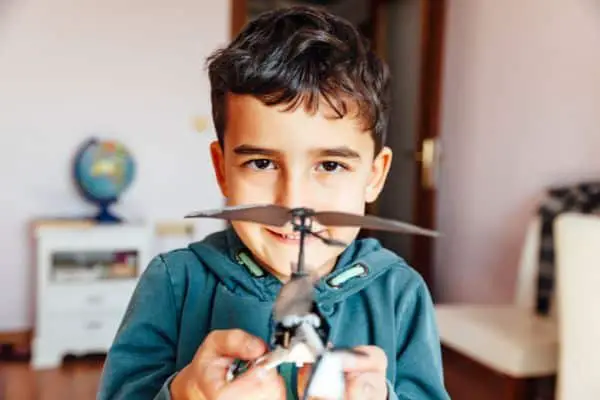
Choppers are without a doubt very cool (or at least were very cool when we were kids).
The mechanics behind how the ‘bird’ operates is a true fascination.
This is an easy yet interesting and achievable science project that looks to teach ground concepts about how the motion of the propeller causes lift.
What you’ll need
- 8.5x20mm brushed motor (Available cheaply on Amazon).
- Mini propeller.
- Battery.
- Small box. (You can use a matchbox).
- Four straws.
- Glue.
- Small switch.
What to do
- Cut the straws into halves.
- Attach four of the half straws vertically to the matchbox (on its side) using glue.
- To make the skids, connect the remaining half straws horizontally.
- Attach a tail and a fin to the rear side of your helicopter for balance.
- Make a hole for the motor shaft on the surface of the matchbox.
- Place the battery and the motor inside the box and carefully glue them in place.
- Fix the motor shaft outside the box.
- Wire the switch and power up the motor.
How does it fly?
Due to Bernoulli’s principle, the propeller generates a lift force that changes the pressure of the oncoming air. This pushes air downwards.
An equal reactive force is developed under the ‘little bird’ causing lift-off.
#2. Alpha ‘Woodly’ F1 Race Car – [Energy Transformation]
Are you a big fan of the F1 race competitions?
Bring the adrenaline right to your home with this simple custom project as you guide your little genius on an adventure to learn about elastic potential energy.
Feel free to tweak the design for creativity.
How wild would it be for Lewis Hamilton or Michael Schumacher to try out your race car design in their finals instead?
(Hint: your kid can even have a round of pretend play using a LEGO figure of Hamilton. Even though their DIY race car won’t look nowhere near the fancy LEGO Mercedes!)
What you’ll need
- Three popsicle sticks.
- Two plastic straws.
- Four bottle caps.
- Three rubber-bands.
- Glue.
What to do
- Glue the three popsicle sticks flat-side-up to form a triangle.
- Make holes at the center of each of the bottle caps.
- Take one of the straws and cut it in half.
- On each half attach two bottle caps to form two pairs of wheels and glue them in place.
- Take each of the two sets of wheels and glue them in place on the wooden frame.
- Cut the other straw into half the cut one of the halves into two quarters.
- Attach one of the quarters across on the intersection of the triangular-wooden frame
- Attach the other quarter across on the vertically placed piece of wood in symmetry with the quarter straw at the intersection.
- Take two rubber bands and wind each on the hind wheels.
- Take the remaining rubber band and place it horizontally across the two straws cut in quarters.
- Turn the hind wheels to tighten the rubber band and release.
Use the guided video below to hook up the battery to the motor.
What happens?
The stretched rubber band stores elastic potential energy. Upon release, the energy is converted into kinetic energy, which causes the car to move.
The Alpha Woodly finally comes to a halt when the rubber band is fully unwound and back to zero tension.
#3. ‘Maglev’ Metro Setup [Magnetism]
Magnetically levitated trains are just about the most futuristic depictions of the world of tomorrow. Well, you can make one today.
How cool is that?
With just a few basics from the theory of magnetism, this fascinating and cheap project interestingly blends a healthy dose of scientific methods with fun.
What you’ll need
- 30 inches of uninsulated copper wire.
- AA battery.
- Marker pen.
- 4 neodymium magnets (Available on Amazon).
What to do
- Wind the copper wire around the marker pen at least 20 times to create a spring-like rail.
- Attach a pair of magnets on each side of the battery.
- Place the battery inside the coiled wire.
Why does it move?
The magnets will contact the copper wire creating a current flow in the coil. The coil will in turn become an electromagnet only in the region around the ‘train’.
The electromagnetic coil and the magnets repel each other on one side since their magnetic fields are aligned. An opposite reactive force develops which propels the battery forward through the coil.
This principle is a premise of Ampere’s Right-Hand rule.
Check out the demonstration below.
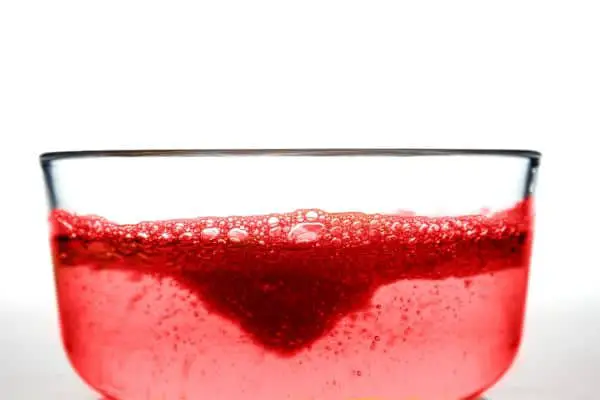
#4. Crystal Eggs [Crystallization]
Do you want to add some color to your living room?
Combine science and art and see what can come out of it–what could go wrong? This interesting project involves crafting crystalline eggshell decorations. It uses very simple and available materials lying around the house to enforce some chemistry knowledge.
These crystal eggs are not dangerous, but are rather very decorative and teach kids about sedimentation and crystallization.
What you’ll need
- Alum powder (Get it on Amazon).
- Glue.
- Some hot water.
- Three uncooked eggs.
- Three storage containers.
- Food color (different colors would be fun).
What to do
- Pour the hot water three-quarters way into the three containers.
- Pour in a generous amount of alum powder into the hot water while stirring. Make sure that all the powder has completely dissolved.
- Crack the eggs carefully in half and pour the yolk and white into a separate bowl. (Make yourself a treat!)
- Wash the six egg shell halves carefully and dry them completely.
- Once they are dry, apply some glue on the inner side of your shells, and sprinkle some alum powder on each shell.
- In your three beakers, add the different colored food colors and stir.
- Add a pair of egg shells carefully to each beaker and submerge it completely in the colored water.
- Let them sit for 10-15 hours.
What happens
Crystal formation is made possible due to a process called sedimentation and crystallization.
There are many particles of alum powder floating around in the hot water. As they start cooling slowly over time, they would want to find a place to rest on.
As a result, they tend to recreate their natural crystal structure.
#5. Dancing Balls [Static Electricity]

Remember the childhood ‘ruler rubbed on hair’ experiment?
This doesn’t bring the old classroom fuss back but rather tweaks it a bit to make it fun. The project investigates closely the effect of static charges on surfaces.
What you’ll need
- Plastic sheet.
- Styrofoam balls (at least five).
- Aluminum foil.
- Four small wooden blocks.
- A piece of cloth.
What to do
- Take the styrofoam balls and wrap each of them with aluminum foil.
- Take the remaining piece of foil and curve its edges to foam some kind of a cuboid enclosure.
- Place the four wooden blocks each at the corners of your cuboid.
- Place the wrapped balls inside the cuboid.
- Cover the top with the plastic sheet, letting it rest on the wooden blocks.
- Rub the plastic sheet gently with a piece of cloth.
Observation
The balls will start moving around haphazardly in a sporadic manner until they finally settle.
However, when you put your finger on the plastic sheet, they will start jumping up and down again.
What happens
Rubbing the plastic sheet with the clothing gives it static charges. The random movement of the balls is due to unbalanced charges between the balls and the plastic sheet surfaces.
Once the individual charges have been balanced, the balls will finally settle and stop dancing around.
The random movement of the balls begins once again when the plastic sheet is touched. Why?
#6. Saline Glowing Bulbs [Saltwater Lamp]
Imagine being able to light your kid’s doll house using salty water. Or maybe you just want a truly bizarre chemistry experiment for them.
Sounds impossible?
No, it’s not. With the aid of a little physics and chemistry, you can easily achieve a perfect shine on a bulb, making it seem like magic.
Plus it’s cost-effective and sustainable.
What you’ll need
- Salt.
- Cold water.
- Insulating duct tape (You can use masking tape).
- A battery.
- Aluminum foil.
- Three insulated wires about 10 inches each.
- Bulb.
- Two popsicle sticks.
What to do
- Wrap aluminum foil around the two popsicle sticks.
- Attach two of the insulating wire on top of the wrapped chopsticks and secure them with the tape.
- Cut about half inches of the insulation off the end of the two wires,
- Attach the naked wire of one of the sticks to the positive terminal of the bulb.
- Tape the other naked wire on one of the threaded parts of the light bulb.
- Take the third wire and cut about a half-inch of insulation on both its ends.
- Tape one side of this wire to the battery’s negative terminal and the other end of the bulb.
- Add two cups of water into a beaker and place the two chopsticks in it with the side taped with wire away from the water.
- Add four tablespoons of salt to the water and stir.
Why does it light?
Saltwater contains sodium and chloride ions which can move freely. An ion is just an atom that has either gained or lost an electron, leaving it charged.
When the electric potential of the battery is introduced, the ions migrate to the opposite poles to their charge constituting a current.
This current is the one responsible for making the bulb glow. This kid-friendly project demonstrates the real-world application of the saltwater lamp.
#7. Air Balloon Race Car [Forces]

I can’t think of a better way to learn Newton’s third law of motion without mentioning the old-fashioned balloon car experiment.
The forward momentum built when propelling these cars is just mind-blowing–if you ignore the sound.
What you’ll need
- A plastic bottle.
- A long straw.
- Balloon.
- Wooden skewers.
- Four bottle caps.
- Glue.
- Tape.
What to do
- Make holes on the caps.
- Glue two pairs of wheels in place using the skewers and caps.
- Make a hole at the bottom of the bottle and glue the straw through it.
- Attach the balloon to the mouth of the bottle and glue the wheels in place.
- Blow through the long straw and release the toy car once the balloon is fully inflated.
Why does the car move?
When the balloon is inflated, it possesses potential energy within its environs.
The third law states that every action force has an equal and opposite reaction. Thus, the air flowing out of the balloon as it deflates pushes the car forward.
#8. Sticky Water in Glass [Air Pressure]
Science is always an interesting way of interacting with the world around us. This project accurately shows how air pressure affects us and our surroundings.
It’s probably the simplest one yet. You don’t need anything more than what you’ll get in your kitchen already.
What you’ll need
- Paper towel.
- Cardboard plate or Manilla paper.
- Glass.
- Some water.
- A candle.
What to do
- Place the paper towel on the tray.
- Wet the paper towel completely with water.
- Place the candle at the center of the wet paper towel and light it.
- Cover the candle with dry glass and try lifting the glass.
What happens
The fire uses up all the oxygen in the glass and finally extinguishes the flame.
The hot air in the glass starts to cool down and tries to pull the paper towel into the glass thus creating a suction at the boundary between the paper towel and the mouth of the glass.
This suction results in the glass getting stuck on the cardboard plate.
The air pressure outside the glass is higher compared to that of the vacuum inside the glass. As such this unbalanced force allows the paper plate to remain in position when lifted up.
#9. Floating Paper Clip [Surface Tension]
Have you ever wondered why water droplets are spherical in nature?
In this experiment, we are going to uncover the mystery behind this phenomenon.
What you’ll need
- A glass of water.
- One paper clip.
- Liquid soap.
- Tray.
- Water.
What to do
- Place the glass of water on the tray and fill it with water.
- Gently place the paper clip on the water surface horizontally.
- Observe.
- Then add a drop of soap to the water.
What happens
In the first instance with pure water, the paper clip floats on the surface of the water. Upon adding soap into the water, the paper clip immediately sinks.
The surface of the water forms some kind of dome shape due to surface tension. This allows the metal paper clip to float on the water surface instead of sinking.
When soap is applied to the water, it weakens the surface tension forces, thus the paper clip sinks.
Frequently Asked Questions
What are some cool science projects?
Some cool science projects you can try out include the DIY lemon battery, the saltwater lamp experiment, the Maglev metro setup and the can crash experiment. A lot of which, you don’t require a science background to pull off.
What are some easy science projects?
Some easy science experiments are like the dancing balls science activity, the crystal eggs, and the Elsa ice experiment. You can also try out the lung balloon experiment or teach some math with this build-and-learn DIY abacus project!


