
3 Science Projects For Seniors (Fun Routine Change!)
Learning is a continuous process. Spoiler alert! We never really stop learning.
Contrary to popular belief, it’s never too late to pick up a few more things in the field of science. And that’s just the beauty of it.
While the residents in your care home are not looking to venture into science related careers, jogging their scientific brains once in a while is a great way to keep them interested in learning new things.
Lifelong learning has proven to be a great way for people of all ages to stay alert, motivated, and enthusiastic about life.
Mix up your regular ice cream social or occasional tailgate parties with these stimulating senior science projects, not only to entertain, but also boost your care receivers’ mental power.
Let’s first look at the key things you shouldn’t miss when handling science projects for seniors.
What should I look out for?
Choosing a good activity for your care home programs can be a daunting task, especially when you consider residents’ physical limitations and impaired cognitive abilities that come with old age.

Not to fret, below is a carefully revised action plan I designed to ensure effective implementation of the science projects during your sessions.
Project Plan
To make it work, there are fundamental steps that need to be taken:
- Introduce a phenomenon – Focus on the main topic of study to stir up interest as you usher in the project itself. Try to ask as many questions as possible.
- The project itself – Engage your participants while leading the demonstrations using items mostly available already or from your local store.
- Discussion – Ask follow-up questions as a way of plastering the learning points for the project.
Now that that’s out of the way, here are 3 fun project ideas you can try out with your residents.
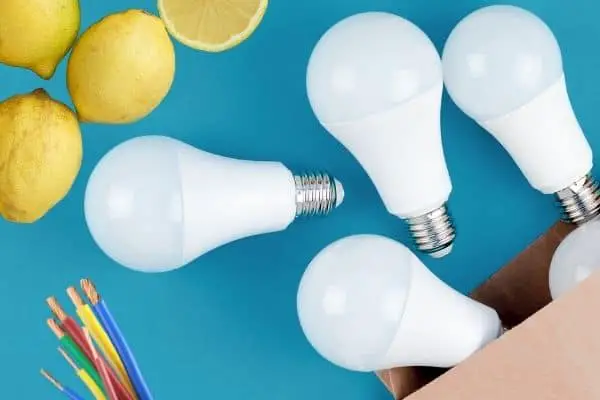
1. ‘Lime Light’ — DIY Lemon Battery
Batteries are found in most of our everyday use appliances– our cell phones, our TV remotes and wall clocks. But how do they work? They don’t work forever. What makes them stop working?
This interesting project is easily the best way to explain how batteries work while still keeping all the fun.
Also, you get to have an interactive session and drink lemonade after the session.
Model — ‘Lemonade Battery’
The lemon battery is an educational setup that borrows a lot from ‘the voltaic pile’ invented by Alessandro Volta, an Italian physicist, in 1800.
The original model has two metals (copper and zinc) plugged into a lemon.
Well, making that does seem like fun. But you can switch it up a bit to make things more interesting. Instead of making one setup using a lemon, why not try 5 setups using lemon juice instead.
When life gives you lemons, make lemon batteries!
What you’ll need
To aid in making the experiment easy and cheap to perform, you can use things already available in the kitchen or office where possible. Get the following:
- A lemon reamer
- Lemons
- 5 small storage jars with plastic lids
- A paper scalpel or a razor blade
- About 3 inches of 18mm gauge copper wire
- 5 galvanized nails (covered in zinc) or 5 pieces of zinc metal (ideal)
- 5 LED bulbs
- About 50 inches of insulated copper wire
In case you aren’t able to find the nails or the zinc metal pieces, you can use steel paper clips from the office. Though your battery won’t have as much power.
Make sure to get enough lemons for the lemonade session!
Procedure
- First, carefully cut out 5 pieces of the insulated copper wire of about 8 inches each then strip about an inch of the plastic insulation off both ends of each wire.
- Drive the nails through the plastic lids. Try to offer as much assistance as you can to avoid any injuries.
- You can use some heat to drive the remaining copper pieces through the lids to make two terminals.
- Use the lemon reamer to extract the juice from the lemons and pour it halfway into the jars.
- After sealing the jars, firmly wrap and twist the exposed ends to all your battery terminals and the remaining ends to the two terminals of the LEDs.
What happens
When you turn off the lights, you should see the LEDs light up. This means your battery is working and produces an electric current.
How does it do that?
The citric acid present in the lemon juice acts as an electrolyte.
An electrolyte is a substance that conducts electricity when dissolved in water.
Electrons, which are tiny subatomic particles whose motion makes electricity, travel from one terminal to the other through the bulb.
Try This!
Before freezing, add food coloring to the water to make it appear like Elsa is stuck in a blue (or any color of your choice) ocean.
More Power!
You can get a little more power by connecting more than one battery in series. To make things more interesting, try powering a small device like a digital watch.
Does it work? If not, why?
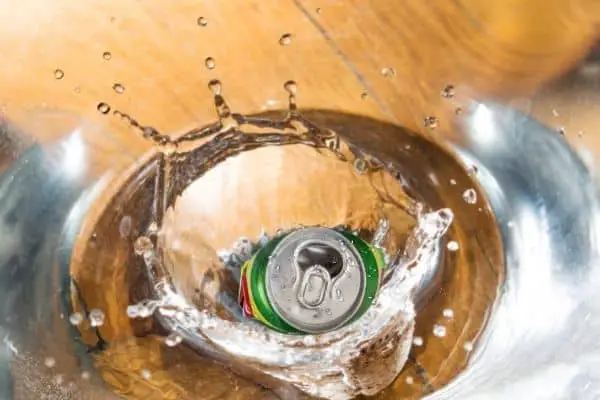
2. Can Crash — Air Pressure in Action
Almost all of us have at some point used a straw. Yet not many have the slightest clue about what happens when you drink something using a straw.
Atmospheric pressure, pressure due to the weight of the air in the atmosphere, is responsible for most scientific phenomena that we ignore most of the time.
This project outlines clearly how air pressure interacts with bodies through a simple setup.
Objectives
- Explain the characteristics of air.
- Explain how air pressure works.
- Discuss how air pressure affects our daily lives.
Primer
For this project, it is important that your seniors know how air behaves first to understand the chief objective. Air being gaseous in nature is made up of molecules which are widely spaced.
This makes it possible for expansion and contraction to occur.
Air, just like all gases, expands when heated and contracts when cooled. With this foundation, it becomes easy to understand the concept of air pressure.
Air always flows from a high-pressure system to a low-pressure system.
What to get
You can get all materials needed from the kitchen. Fetch:
- A glass bowl
- Empty can of soda (made of aluminium)
- A pair of tongs (you can use ones from the ice machine)
- Water
- Kitchen gloves or mitten
- A stove
- Goggles
To make sure no one misses the fun part, you can get more than one can for the demonstration.
What to do
- Pour some water into the soda can until it’s a quarter-way full.
- Fill the bowl with cold water but leave room for displacement.
- While holding the can with the pair of tongs, heat it up on the stove until you see water vapor coming out of the opening. Don’t forget to put on your protective gear when handling this part.
- In quick succession, remove the can from the stove and flip it upside-down then immerse it in the cold water.
Expectation
The can implodes almost immediately after immersion. It crashes while producing a loud thrilling noise releasing its contents.
What happens
Before the can is heated, the air pressure inside and outside the can are equal meaning nothing happens. When the can is being heated, the temperature of the water rises.
It reaches a point the water starts changing into vapor hence the steam that you were looking out for.
The vapor pushes out some of the air that was initially inside the can while the rest of it is pushed out due to expansion.
When flipped and immersed in cold water, the water vapor changes back to water. This in turn leaves behind an empty space creating a low pressure region.
Since the air pressure outside is high, it causes an imbalance. This difference makes the air from outside try to rush into the can which has no opening.
The force exerted by air molecules on the surface of the can crashes it causing an implosion.
3. Electromagnet — Introduction to magnetism
Magnets are cool. We use them in many places around the house such as the ones we stick on the refrigerator and ones found in wireless chargers.
In most cases, we see and interact with permanent magnets. Permanent magnets retain their magnetic properties for a long time. Now imagine having a magnet that you can turn on and off at will.
Wouldn’t that be cool?
Magnets that can be turned on and off are called electromagnets. Electromagnets are found in most devices we use such as motors, microphones and speakers.
Take your seniors to a whole new level and explore the world of magnetism with this project.
Objectives
- Know how electromagnets work.
- How voltage affects the strength of an electromagnet.
- Impact of the number of turns on the strength of electromagnets.
- See if using different materials affect electromagnetic properties.
An electric field is a region that surrounds charged particles. Its interaction with other charged particles’ fields can either lead to an attraction or repulsion.
What do I need?
- 2 iron bolts or nails
- 2 steel bolts or nails
- Enamel-coated naked copper wire of about 120 inches in length
- Three 6 volt lantern batteries or any battery of the same capacity
- Scalpel
- A box of paper clips
- 4 double sided alligator clips
- Wire cutter
- Scalpel
Experimental Procedure
- Cut and wrap the copper wire around the iron bolts making 100 turns on the first bolt and 200 turns for the other one.
- Leave at least 2 inches on the ends of the wire.
- Using the scalpel, scrap off the enamel coating of the copper wire from the tips.
- Attach the alligator clips to both terminals for each coil.
- Connect the battery and hover the bolt over the paper clips.
- Repeat the connection but this time try using two batteries connected in series.
- Do the same for the steel bolts.
What happens
According to Michael Faraday, all electromagnets work on the principle that an electric current in a wire produces a magnetic field.
Ferromagnetism is an unusual property that occurs in only a few substances. Iron is a ferromagnetic material. That is why it gets magnetized when current flows through the copper wire.
When you use two batteries in series, you’ll get a stronger magnet. This indicates that the more the voltage the stronger the magnet.
Steel is an alloy of iron, meaning it also exhibits ferromagnetic characteristics. Though it takes a much longer time to magnetize and demagnetize.
That’s why they are used to make permanent magnets.
Going further
To make it even more interesting, you can try using materials of a larger and smaller diameter and note down the number of clips you collect. Also, you could mix it up a bit by using all the batteries.
Your electromagnet may get hot if you leave it connected for a long time. You can disconnect it by removing one alligator clip from any battery terminal.
Frequently Asked Questions
How does the lemon battery experiment work?
The lemon battery relies on the principle that acids react with metals (citric acid for this case) producing electrons. Copper accepts the electrons more readily compared to zinc, resulting in a net motion of electrons flowing from zinc to copper through the bulb.
The bulb is then lit by an electric current, which is made up of moving electrons.
Who invented lemon battery?
Alessandro Volta came up with the first model which used salt water (brine). This was properly demonstrated through his work with the voltaic pile. Lemon acid replaced the brine.
How does an electromagnet work?
Electromagnets are made up of coils of wire that conduct electricity. Every moving charged particle has an associated magnetic field. When electricity is supplied to the coils, there exists a temporary magnetic region around it which magnetizes the ferromagnetic material inside.
Which is an example of electromagnetic science fair project?
You can make a solenoid lock which uses the soft iron core that retracts as the lock mechanism. The core has a return permanent magnet or a soft spring to make sure the door is locked all the time.


