Summer Engineering Projects for Kids & Adults – 5 Ideas for All Skill Levels [Easy and Cheap!]
Summer and projects, huh?
Sounds like a perfect combination for science and engineering enthusiasts.
My nephew Robert joked about how summer can be a good time to learn new things, yet many people tend to slip into ‘consumer mode’ wasting it passively just watching TV.
That’s why these five summer engineering projects are not only a great way to pass time but also enable you to develop and hone your engineering skills. Some of them do not even require any engineering background as a prerequisite and are a great way to learn something new– not to mention they are cheap.
Plus, the difficulty will vary progressively, so there’s something in there for every level and skill set.
Read on to find something that will inspire your (or your kid’s) next tinkering session!
Related post: 5 Cool Summer Programming Projects for Kids (Screen-Free Included!)
#1 DIY Bubble Blower [For Preschoolers]

It’s no secret that kids love bubbles.
No wonder it keeps them entertained for hours. Instead of buying bubble blowers with the traditional bubble wand, why not make one?
This fun project is for homeschool and preschool kids and makes use of readily available materials.
What you’ll need
- Plastic cup.
- Plastic straw.
- Water.
- Soap.
- Key-ring.
What to do
- Make a small hole on the side of the plastic cup. The hole should be big enough to stick in your straw.
- Pour a mixture of water and soap into the cup. The liquid level should be lower than the hole you made.
- Attach the key-ring to the plastic straw.
- Stick the ring end into the cup and blow away the bubbles.
Takeaway
Bubbles are a fun way to learn scientific concepts like elasticity, surface tension, and chemistry.
They are observed to be pockets of air wrapped in an oily film whose inside and outside surfaces consist of soap molecules. Water is found in between the two soap layers.
The water together with the two soapy surfaces holds the air inside under the forces of surface tension.
This experiment can be a great opportunity to answer questions such as why bubbles are round? Why do bubbles pop?
Why do bubbles stick together?
It’s obvious that there’s a LOT of learning and fun in your humble bubble!
#2 Water Bottle Vacuum Cleaner [DIY Project for High Schoolers]
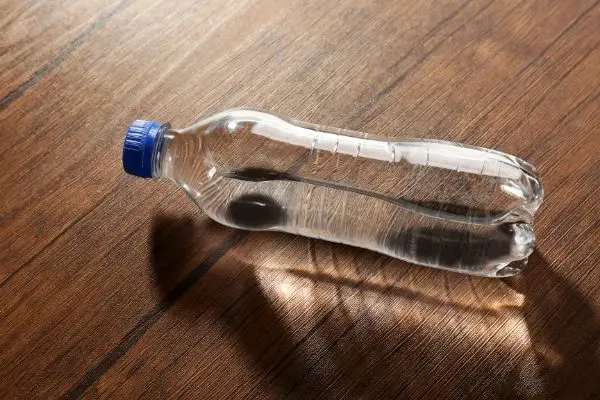
Vacuum cleaners have been with us since 1901.
So if the first vac saw the light of day 120-odd years ago, how tricky can it be to DIY a simple vac today?
Oddly enough, it’s easier than it seems! All you need is an empty water bottle, a DC motor, and a couple of other items that probably lie around the house already. (More on that below.)
How do they work?
The fan in the cleaner forces air to move in one direction which creates a low-pressure region on one side (hence the name ‘vacuum cleaner’) and a high-pressure region on the other side.
Air which is at atmospheric pressure rushes to fill the partial vacuum through the nozzle and in the process picks up dirt particles.
If that sounds interesting already, check out this cool mechanical engineering project that creatively turns a plastic soda bottle into a vacuum cleaner.
What’s even cooler is that it’s also a creative way to recycle plastic bottles.
What you’ll need
- Plastic bottle.
- Empty soda can.
- A porous piece of cloth.
- Double-sided tape
- DC motor.
- Hot glue gun.
- Small bendable pipe.
- Cutting tools (Paper cutter and big pair of scissors).
What to do
First, you’ll need to make the dirt compartment as it’s the main part.
- Cut the plastic bottle in half.
- Make suction holes at the lower part of the bottom half.
- Cut out a hole for the motor at the bottom of the lower half.
- The top half will form the suction tube. Attach the bendable pipe to the lid of the bottle and reinforce it with glue.
The fan uses some interesting concepts from aerodynamics.
- Cut open the soda can.
- Using a pair of compasses, trace a circular section for the fan.
- Cut out the traced piece and cut out fins to resemble a fan.
- You can use the inner tubing of a pen to attach the fan to the motor shaft.
- Fix the motor to its hole with the fan blades on the inside of the bottle.
Final assembly.
- Using the double-sided tape, put together the top and the bottom parts with the porous cloth in between.
- Power the motor and test out your vacuum cleaner.
No need to worry about the materials as you can very cheaply source them from Amazon or your local store.
To make it easy to use, you can include a cardboard handle that you can decorate to your liking.
#3 Homemade Solar Mobile Phone Charger [Intermediate to Advanced Enthusiasts]
Charging your phone is already an everyday routine.
Electricity is the most common energy source in many households (check out our article on hydroelectric power generation). Wouldn’t it be cool to charge your phone with a free and renewable source of energy?
In this summer project for engineering students, discover how you can use solar energy as an alternative power source to juice up your phone.
What you’ll need
- 6V mini solar panel (available on Amazon).
- USB Connector.
- 7805 regulator IC (around $0.06 per piece).
- Connecting wires.
- Glue.
- Pencils.
What to do
- Using pencils, support the solar panel on cardboard using glue.
- Connect the solar panel and USB to the regulator IC terminals (See the video below to see how to connect the terminals).
- Once set up, position the panel so that it’s exposed to sunlight.
- Connect your phone charger.
If you know the struggle with charging phones, this project reduces the hassle of having to compete with others for cables, ports, and outlets.
An added advantage is that the system is very portable due to its miniature size.
Solar is an environmentally friendly source of energy and an awesome alternative to electricity.
#4 A Chapstick Flashlight (Under $10) – [For Everyone]
Nothing is cooler than a chapstick that actually lights up.
As much as this project is mostly fun-oriented, you never know when you’ll need a flashlight.
This incredible project helps one explore LEDs as binary actuators and button switches.
What you’ll need
- Empty Chapstick tube.
- Tactile switch.
- A23 12V Battery (available on Amazon).
- 470-Ohm Resistor.
- LED (28,500mcd, 20mA, 3.5V) – specifications available on most packages.
- Solder gun and wire.
- Wire.
What to do
- Cut a small portion of the negative lead of the LED and solder the resistor to it.
- Put the terminals of the LED through the top of the chapstick.
- Solder a wire to the negative terminal of the LED and the negative terminal of the battery.
- Solder a wire to the resistor terminal and one end of the switch.
- Insert the battery into the chapstick tube and solder the other terminal of the switch to the positive terminal.
- Using the glue, attach the switch to the bottom end of the chapstick and test.
#5 Homemade Van de Graaff Generator [Engineering Students]
Powerful machines tend to excite everyone. If you ask me, I’d trade a lot to get a loud powerful motorbike– not that I already own one.
Keep your creative juices running as you discover how static charges interact with each other.
💡💡 Fun fact: Van de Graaff generators can generate very high electrostatic potentials maxing out at 5 Megavolts (more than 3 million remote batteries) for commercial VDGs.
Are Van de Graaff generators safe for me?
Van de Graaff generators generate very high DC voltages at very low current levels making them safe to operate.
They have been used in schools and museums since the 1930s with no known cases of injuries– even to children. They are commonly mistaken for tesla coils which are very dangerous to operate.
‘Spark’ the mood this summer for your kids and buckle up for a ‘hair raising’ experience.
What you’ll need
Materials:
- Wooden/bamboo skewer.
- 4 AA batteries.
- A large rubber band (0.25 inches wide).
- Glass fuse (sourced cheaply on Amazon).
- Aluminum soda can.
- Stranded wire.
- PVC pipe – 18” in length.
- PVC bushing, coupling, and tee.
- 5V DC motor.
- Electrical tape.
- Candle.
- Switch.
Tools:
- Hot glue gun and glue.
- Hand saw to cut PVC.
- Hand drill to make holes (tip: you can use a hot nail to make the holes).
What to do
Step 1. Making the base.
- Stand the PVC coupling and insert the bushing on the thinner end.
- Cut about 2” of the PVC pipe and slide it into the bushing.
- Fit the tee onto the pipe. Hint: Press-fit them just tight enough for easy disassembling.
Step 2. Preparing the motor.
- Wrap the motor in the electrical tape so that it fits on the outlet of the tee.
- To make the lower roller, wrap about half an inch of the tape around the motor shaft.
- Make a crowned pulley by splitting the tape into half then wrap it around the middle part of the motor shaft. This will help keep the belt in place when operating.
Step 3. Making the ion collector.
- Enjoy 12oz of your favorite beverage then clean the can.
- Use a can opener to remove the top part of the can.
Step 4. The top piece.
- Remove the caps of the glass fuse and clean it up. You can use the candle to heat the caps for easy removal.
- Make holes through the diameter of the remaining PVC pipe.
- Loop the rubber band through the glass tube and align the tube with the holes made.
- Slide the wooden skewer through the holes and tube then cut the overlapping ends.
- Secure the skewer using glue.
Step 5. Making the brushes.
- Make a hole fairly inline but orthogonal to the roller holes.
- Thread the stranded wire through the hole and remove about an inch of the insulating sheath.
- Using the stranded wire, make the brush by combing out the wire strands and placing it close but not touching the rubber band.
- Strip the insulation on the other end and connect it to the inside of the soda can. You can secure it with the tape to make sure that it always touches the can.
- Drill another hole at the bottom and make a similar brush with the lower roller.
Step 6. Final assembly.
- Fix the can to the top coupling and then attach the top piece to a reasonable length of the PVC pipe.
- Gently stretch the rubber band and pull it through the PVC pipe shaft and loop it through the lower roller.
- Connect the motor to the batteries and switch then turn on.
You can use the guided video below in case you get stuck.
How it works
As the rubber band revolves around the rollers, it generates static charges which are transferred through the brushes.
You can hold on to the lower brush and then run the motor to store charges. If you touch the can, you should be able to feel the effect of the electrostatic charges on your skin.
To get a more satisfying experience, charge the VDG long enough then use it in the dark.
If it’s charged sufficiently, a blue spark can appear when you get your finger close to the can because of the ionized air.
Frequently Asked Questions
What are some easy engineering projects?
Some easy engineering projects you could try in your free time include making a cheap balloon car, a propeller-powered car, and building a solar mobile phone charger. The best thing–these are adjustable to many ages and different skill levels!
What is the greatest engineering project?
It’s mostly diverse and varies depending on the field of engineering. But some of the greatest projects known include Saudi Arabia’s Jubail II (the world’s largest civil engineering project), the hyperloop, and Space X’s aerospace engineering project.
How do I make my own engineering design?
The process of coming up with an engineering design can be quite rigorous. First, you have to define the problem and brainstorm possible solutions. Do extensive research while considering alternative approaches. Write a proposal and then finally come up with a prototype.


