
AP Environmental Science Projects [Top 4 Learner-Centered Ideas]
Let’s face it: students frequently enroll in AP Environmental Science class to either fill up their schedules or meet some credit requirements. It’s often seen as a repetitive life science class to pass time.
In reality, there is so much the course offers than just college credit.
Taking the course sets you to gain more knowledge about the environment and how human activities impact it. But it can also serve as a stepping stone to a bright career.
When compared to other AP science courses, it’s the same level of rigor, only it lacks a lab. This doesn’t just make students meet six days a cycle, the practical aspect of problem-solving becomes a foreign concept with little to no material to relate to that resembles a lab session.
Below is a well-crafted list of project-based environmental science activities that are learner-centered in a way that brings the real world closer to you as you study.
Although they are adaptable for different age brackets, these projects are best for advanced high-schoolers!
And if you’re on the lookout for something less sophisticated, check out my article on environmental science activities for middle and high schoolers.
#1. Carbon (IV) Oxide Absorption Core
In a bid to curb the effects of global warming, this activity will introduce you to the world of problem-solving through quantitative analysis.
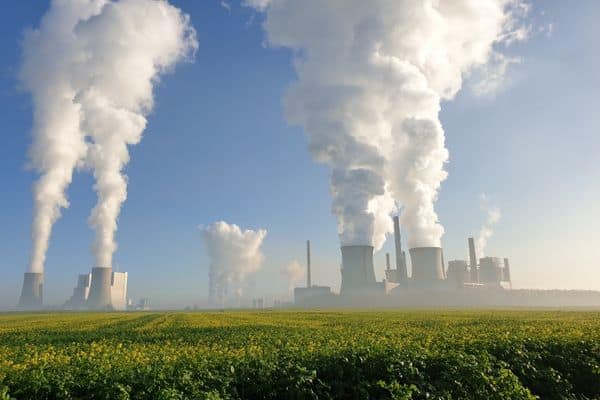
High schoolers should already know how greenhouse gasses cause global warming. But this project dives deeper into how we can fight the emission of greenhouse gasses to save the planet.
Once released, carbon dioxide, a common greenhouse gas linked to global warming, is more challenging to remove and absorb. The development and improvement of new methods for carbon dioxide sequestration is ongoing.
This project borrows concepts learned from Chemistry and Physics classes to device a possibly cheaper alternative method of carbon dioxide removal in flue gas treatment plants.
You can creatively convert this to a science fair project by improving on the prototype model to suit different applications.
What you’ll need
- Vinegar
- A switch
- Hot glue
- Baking soda
- 5V battery
- Cotton wool
- Insulated wires
- 2 thermometers
- 2 5V DC motors
- Thermoplastic sheet
- Potassium hydroxide
- 2 large cardboard boxes
- 2 propellers (about 5 inches in diameter)
- 20 inches long PVC pipe with leads (about 6 inches in diameter)
What to do
- Cut the PVC pipe in half.
- Make holes on the leads to attach the motors and even larger holes for ventilation.
- Fix the motors to the leads with the shaft facing inside.
- Attach the propellers, both facing the same direction.
- Add 30 drops of potassium hydroxide to the cotton wool until it is almost soaked.
- Ensure the thermoplastic is porous enough.
- Cover the two cut ends with the thermoplastic sheet then place the soaked glue in between.
- Assemble the setup by fixing the leads and gluing back the cut pieces with the soaked cotton covered with thermoplastic sheets in between.
- Mix a portion of the baking soda with vinegar in 2 small containers and place them inside each of the boxes.
- Make the motor connections, switch on the device, then place the reaction core inside the box with the chemical setup.
- Place the thermometers inside each box and place them outside to sit in the sun for about 6 hours.
🚨 Caution: Concentrated potassium hydroxide can be dangerous when swallowed. Handle with care and ensure you put on gloves and protective goggles when dealing with it.
What to look for
After some time, the temperature of the box with the setup will be slightly lower than the temperature of the other box.
What happens
The aim of the initial reaction is to supply carbon dioxide. The reaction between the vinegar and baking soda is a classic reaction used to produce carbon dioxide, salt and water.
Carbon dioxide, being an acidic gas, reacts with the potassium hydroxide in the core, which is basic, to form salt and water. It’s also interesting how the pH level level of the base in the core has no effect on the reaction rate in the core.
The fans increase the rate of airflow into the reaction core of the setup.
This suits applications like absorption of acidic gasses from industrial chimneys or motor vehicle exhaust pipes, of course with a little modification.
An added advantage is, potassium hydroxide is constantly reactivated by the acidic nature of CO2 gas.
Good analysis questions of interest could include finding a more reactive chemical to make the machine more efficient.
#2. Self-Adjustable Solar Cooker – Renewable Energy
When tackling the topic of renewable energy, you need to get familiar with the most popular forms of renewable energy in use today, as well as their advantages and disadvantages.
Through this instructional design project, you’ll develop key skills and knowledge on solar energy as a renewable source of energy.
Since solar has already been adopted in the mainstream market, it paves the way for further research on how to improve efficiency. And that’s where you come in! So far, there are three types of solar cookers:
- Box cookers
- Panel cookers
- Parabolic cookers
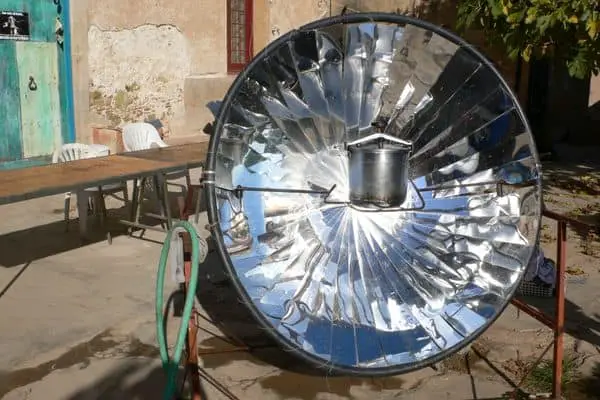
Parabolic cookers (sometimes referred to as curved concentrator cookers) are the most efficient as they reach the highest temperature. But for safe operation, they require frequent supervision and adjustment.
In this project, you’ll solve the problem by creating an automatic adjusting system for the cooker to optimize efficiency.
💡 All the Arduino components mentioned below are in the Arduino Starter Kit for beginners available on Amazon or any other online retailer.
What you’ll need
- A large cardboard box
- Box cutter
- Aluminum foil
- Glue
- A divider
- A protractor
- Arduino Uno
- Jumper wires
- Solderless breadboard
- 4 LDR sensors
- Resistors (1k ohms)
- 2 SG90 micro-servo motor
What to do
First, make the parabolic concentrator.
- Use the box cutter to cut a 4 X 4 inches base out of the cardboard box.
- Using the pair of compasses, trace a circle of about 6 inches in diameter on the cardboard box.
- Use the protractor to draw lines 30 degrees apart across the diameter of the circle drawn. You should end up with pies.
- Repeat the procedure to get two sets of pies.
- Cut out all the pies.
- Use the pies to make a dish like concentrator and glue them in place.
- Using the aluminum foil, cover the concentrator to make a reflective surface on the inner side.
- Glue the concentrator to the base.
- Glue the rotor of the servo motor to the center of the base and the other to the side of the first servo motor.
The Arduino setup:
- Connect all the components with the help of the video below.
- For the code part, you can refer to the Arduino contributor site for reference.
How it works
The parabolic concentrator focuses heat energy from the sun to a focal point which can then be used to cook or boil water. Real-world application parabolic heaters can reach temperatures of up to 550°F, which is impressive.
The automation makes the setup track the path the sun follows eliminating the need to constantly adjust the cooker.
Through this project, we get to appreciate the free energy we get from the sun. Some upgrades you can work on include powering the Arduino using a 5V solar panel, all in an attempt to make the entire setup greener.
#3. Hydroponic Smart Farm – Land and Water Use
You’ve probably heard about aeroponics or hydroponics if you watch the news closely. I was very amazed when I saw refugees from Jordan and some scientists from the UK growing fresh food out of mattresses!
Known as the future of agriculture, hydroponic farms are popping on every corner of the world today. It’s a revolutionary way of growing crops using water-based mineral nutrient solutions in aqueous solvents.
Did you know you can grow plants with just nutrient-rich water and light?
This project uses a microcontroller automation in the control and monitoring of the farm’s soil humidity. It’s not only a cool way to farm, it also improves yield and conserves the environment.
What you’ll need
- PVC pipe
- Arduino Uno
- Jumper wires
- Breadboard
- 5V battery and holder
- 5V relay module
- 5V DC motor pump
- Clear plastic water pipes
- FC-28 soil moisture sensor
- LM293 Comparator
- Root support structure like coconut coir or clay pebbles
- Plant nutrients like GH Floragro (available in local agro stores or cheaply on Amazon)
- Large water container with clean water
- Gloves
- Small cilantro or basil plants
What to do
- Using appropriate materials and a creative mind, make holes on the PVC pipes for the plants.
- Make the support base of the entire structure with the aid of the video below.
- Once the structure is up and stable, add the growing medium of choice to the holes. Make sure you add enough to provide a strong base for growing of plants.
- Wearing gloves, mix the plant nutrients with some water following the directions indicated on the label to make the water reservoir.
- Wet the growing medium with the nutrient-rich water you just made. Be careful not to overwater the medium.
- Plant the vegetables.
- To get the IoT components connected, interface the FC-28 soil moisture sensor with the arduino, making sure you capture the entire code to avoid bugs.
- Stick the sensor into the planting medium and secure the electronic components in place. Make sure water doesn’t get to the electronics.
- Cut the pipe in half and connect both the inlet and outlets of the DC pump.
- Put the other end of the pipe connected to the inlet of pump inside the water reservoir.
- Run the other pipe along the farm, making holes for irrigation close to where the plants are. Don’t make large holes.
Don’t saturate the reservoir with nutrients as it may also affect the plant. It is also okay to use seeds for the experiment.
Note: Some seeds germinate in the dark. You can place them in a dark place to germinate first then take them outside once they germinate for proper growth.
Results
If everything is done properly, the plant should grow bigger and taller with time. Also, the water level in the reservoir should be lower after some time indicating that the plant is absorbing the water.
Discussion
Plants need nutrients, oxygen, light, and water to survive. This makes it possible to grow plants in nutrient-rich solvents in places where land is polluted or scarce. Hydroponic farms provide a sustainable way to practice agriculture in big cities and is potentially the next solution to current challenges in food production.
You can challenge yourself by incorporating cloud and IoT into the project by creating a remote monitoring system using ESP8266.
#4. Greywater Treatment Filter
Graywater water is basically laundry water and wastewater from the bathroom.
It contributes about 65% of the wastewater produced by a typical American household. Seeing this volume, it is important to come up with a suitable solution to reuse this water to make sure it is not being wasted.
Did you know: Only 3% of the water on earth is fresh water?
Although not fit for human consumption, greywater can be very helpful in agriculture. But before we use it to water any lawn, it’s important that we remove contaminants, which are chemicals present in soap.
The treatment method used in this project is easy and is a cheaper alternative to water desalination.
What you’ll need
- Corn cob.
- Hammer.
- Goggles.
- Charcoal.
- Moringa oleifera seeds.
- Cotton.
- Sand.
- 2-liter soda bottle.
- Utility knife.
- Washing powder.
- A bucket of water.
What to do
- Make the case of the filter by cutting the bottom part of the soda bottle.
- Flip the bottle upside down and place a thick layer of cotton to cover the bottle opening below.
- Make activated charcoal powder by pounding the charcoal with the hammer.
- Pour the powder on top of the cotton filter.
- Add some more cotton and then pour on top the moringa seeds.
- Add another layer of cotton then pour on top crushed corn cobs.
- Lastly, put some sand on top of the crushed corn cobs separated by a thin piece of cloth.
- Make some greywater by mixing water and the washing powder in the bucket.
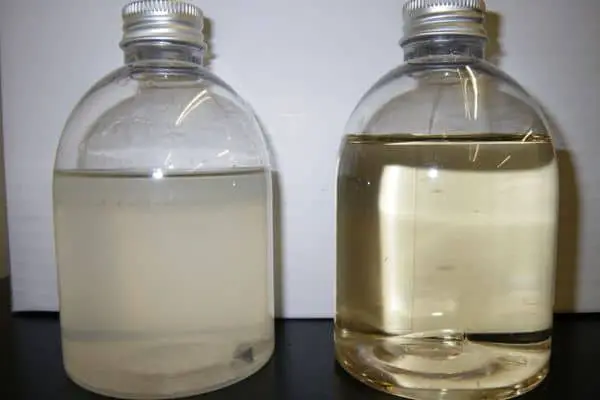
- Pass through greywater from the top and collect filtered water ready for agricultural use.
What happens
In many experiments before, charcoal has been used in greywater treatment as a natural disinfectant in place of chlorine. The chemistry behind this simple filter may actually surprise you.
As simple as it is, the crashed corn cobs are able to trap chemicals in their pores such as magnesium and calcium. A protein with an antimicrobial treatment effect is present in the moringa seeds which plays a key role in the filtration process.
With the combined effect of charcoal, the filter works very effectively to purify water ready for use on the farm.
Frequently Asked Questions
Is AP Environmental Science worth it?
If environmental science is something you want to study further or if you have a strong interest in it, AP Environmental Science can still be an excellent option. However, APES isn’t the ideal option if you’re searching for an AP program to help you get ready for college-level scientific coursework or to give you science credit for college.
Is AP Environmental Science exam hard?
Class graduates gave AP Environmental Science a score of 4.2/10 for overall difficulty, which is regarded to be fairly low. Considering that it’s ranked as the 23rd-most challenging of the 28 extensive AP classes studied, it should be easy.


