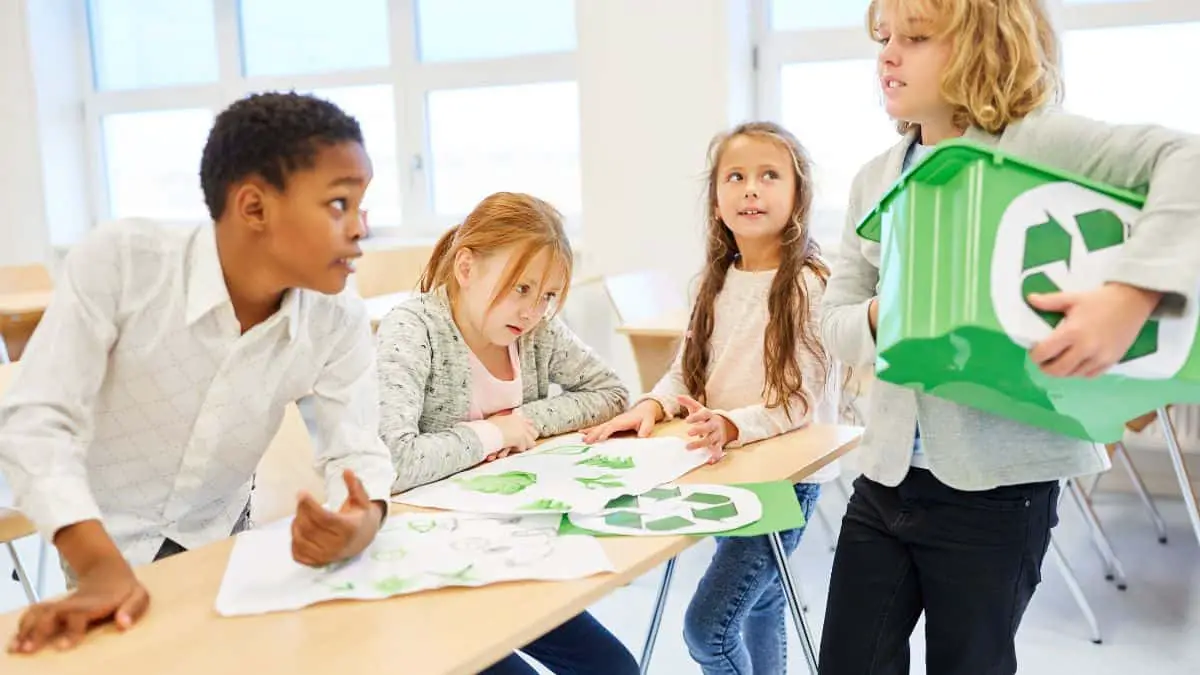
5 Environmental Science Activities for Middle and High School (Low-Cost & Hands-On!)
Indeed, there will always be an environment. But it is looking more and more likely that it won’t be like the one we know today.
Over the past 4 decades, we have experienced tremendous changes in our climate which means that now more than ever, environmental science has to be the talk of the day. Combating this is no easy task, but with powerful tools like education, we can try to reverse the damage already done by our existence as humans.
Below is a comprehensive list of 5 cool environmental science introductory activities you can use to spark the inner environmentalist in your child or student.
They will help middle school students understand climate change, pollution, and fossil fuels vs renewable energy. However, you can easily adapt these to suit high schoolers too!
And if you’re looking for something more advanced, check out my article on AP Environmental Science projects!
Climate Change Activities – A Dive into Global Warming
Atmospheric science is a core part of environmental science as it addresses one of the key environmental problems the world is facing in the world of today, global warming.
Through a phenomenon known as the greenhouse effect, the world average temperature annually increases posing a threat to the future existence of all life forms.
In this project, you can demonstrate the devastating effects of global warming on our climate in the process creating awareness on how to prevent such.
I have broken down the topic into two activities; the first part deals with a demonstration of how the greenhouse effect works, and the other part takes on a solution-based approach.
Did you know that there’s more carbon dioxide in our atmosphere than at any time in human history?
#1. The Greenhouse Effect Jar Model – 5th – 6th Grade

In this project, you’ll give your kids a chance to explore how greenhouse gases contribute to global warming and their effects on the environment as a whole.
Through the use of a simple working model, they’ll learn to protect the environment from pollutants that could be potential causes of global warming.
This introductory activity strengthens the recording and observation skills of the learner too.
Plus, it’s a fun outdoor activity for a sunny day.
What you’ll need
- A clean glass jar with an air-tight seal.
- A stopwatch (a wristwatch also works).
- Two thermometers.
- A notebook and pen.
- A sunny area.
What to do
- Find a clean surface and lay the two thermometers in direct sunlight. Let them sit for five minutes.
- Prepare a T table on the notebook with two columns titled “Thermometer A” and “Thermometer B”.
- After the five minutes have lapsed, take the first reading of both thermometers and record them on the table.
- Put one of the thermometers inside the jar and seal it shut. Be sure to lay the jar on the side to prevent shadowing.
- Lay the other thermometer beside the jar.
- Take a reading of both thermometers every 2 minutes for 30 minutes and record each on the table.
- In the final 6 minutes, place the entire setup in a shaded area. Finish the recording from there.
Expected observation
There is a consistent temperature span drift between the two thermometer readings at any time. The temperature reading of the thermometer in the jar is always higher than the reading of the other thermometer.
The thermometer outside is used as a control experiment.
What’s going on?
Air in the surrounding environment flows freely controlling the temperature around the thermometer outside the jar. This free flow cools the thermometer once it’s been taken out of the sun, hence the lower temperature reading.
On the contrary, the temperature reading of the thermometer placed inside the jar is higher due to the greenhouse effect. The glass walls trap the heat from escaping the jar. This demonstrates how greenhouse gases form a ‘blanket cover’ over the earth’s atmosphere, trapping heat from escaping to outer space.
This leads to a gradual annual increase in the average world temperature, which is referred to as global warming.
Did you know that the Earth’s surface is kept from being too cold by a few beneficial greenhouse gases present naturally? Without them, we could experience temperatures as low as zero degrees Fahrenheit.
Pollution
No doubt the planet’s worst enemy. Human activities, even the little things we do like washing our hands with soap, have proven to cause catastrophic effects on our surrounding environment.
Chemicals that we often use one way or another end up in the water, air, or soil.
In the following projects, we’ll investigate how chemicals can end up affecting our environment when not properly handled.
#2. Ocean Acidification – Aquatic Pollution (7th – 8th Grade)
Oceans are like the world’s carbon ‘sponge’. Scientists call them the world’s ‘carbon sink’. Due to human activities, there is a lot of carbon dioxide released into the atmosphere every single day.
Around a quarter of the carbon dioxide we produce is absorbed by oceans.
This leaves behind a nasty carbon print that affects the ocean’s pH. Since humans started burning fossil fuels nearly 300 years ago, it is said that the ocean has become 30% more acidic.
In this interesting project, you’ll investigate how carbon dioxide ends up in the ocean and how it affects the ocean’s ecosystem.
It’s also awesome because all you need can be found in the kitchen.
What you’ll need
- Red cabbage juice.
- Vinegar.
- Baking soda.
- Two clear plastic containers.
- Two paper cups.
- Tape.
- Plastic wrapper.
- Measuring cup.
- Measuring spoon.
What to do
- To make the red cabbage juice, boil chopped red cabbage in some water then cool. (Alternatively, you can blend the cabbage with water and then use a strainer to remove the residue.)
- Pour one tablespoon of red cabbage juice into each container.
- To dilute, add 3 ounces of water to each container.
- Tape the plastic cup to the rim of the plastic container on the inside but not touching the red cabbage juice. Do the same for the second cup.
- Add half a spoon of baking soda to one cup. Make sure no powder gets inside the juice.
- To the cup with baking soda, add a tablespoon of vinegar and immediately cover both cups with the plastic wrapper.
- You can fasten the leads to ensure the containers are airtight.
- Take pictures of the setup for comparison.
- Wait for 15 mins then see what happens.
Results
The juice in one cup remains purplish-blue while the one in the other cup turns violet.
What do you think of the color change?
Which cup do you think has acidity?
Discussion
When water is added to both containers, the dilution brings the pH of the juice to 7, which means it’s neutral.
Upon adding vinegar to baking soda, the following reaction occurs:
Vinegar + Baking soda → Carbon dioxide + Water + Sodium acetate
Covering the container traps the carbon dioxide inside the container. After some time, the juice absorbs the carbon dioxide to form carbonic acid, decreasing the pH of the juice which in turn changes the color from purplish-blue to violet.
Similarly, the carbon dioxide emitted by us gets trapped in the atmosphere. Due to the accumulation, it is absorbed by the ocean in a reaction similar to the one in the container.
While this emission means that the earth does warm up a bit gradually, it also changes the chemistry of ocean water. And this has effects when it comes to marine life.
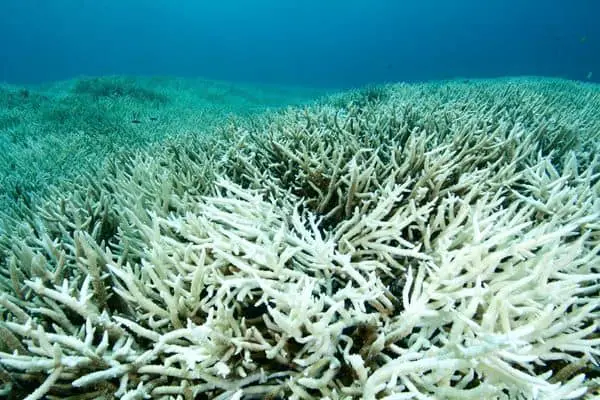
The formation of corals and shells is greatly affected by the pH of ocean water. This means that sea creatures that form shells can’t form them properly leading to diseases.
Find out how corals are affected by ocean acidification.
#3. Modeling Chemical Uptake by Plants (6th – 8th Grade)
Chemicals can end up in our food chain, whether directly or indirectly, and cause negative health effects, or worse, even death.
This project provides a very good platform to kick off a discussion about pollution and its relation to our physical well-being.
It involves modeling a setup to demonstrate how chemicals can end up drawing chemicals, which can then be unknowingly consumed by animals or humans.
What you’ll need
- Water.
- Clear plastic cups.
- Food coloring (preferably different colors).
- Celery plants.
What to do
- Pour some water into the plastic cups.
- Sprinkle in some food coloring and stir until fully dissolved.
- Dip one stem of the celery plant in each cup and let them sit for 24 hours.
- On the next day, cut the cross-section of the stem and observe.
Why are they colored?
From their previous science classes, they should be able to explain how the absorption of water in plants happens. With the help of that concept, you can explain to them how the food coloring ended up in the stem of the plant as well.
Depending on the nature of the chemical (e.g pH level), plants can be affected differently causing an imbalance in the ecosystem.
#4. Oil Spill Experiment (6th Grade)
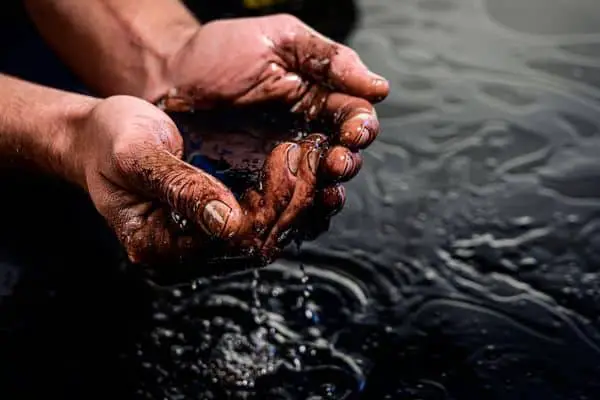
Oil spillage on water bodies imperils drinking water, poses danger to public health, and reigns hellfire on aquatic life. To make matters worse, cleaning up the mess from a spill due to human error or accident is very difficult and mighty expensive.
Videos and images of spillage incidents and very helpful when handling this project.
Be careful with disturbing images of affected animals when dealing with kids.
You can also slide in concepts like why oil and water don’t mix in the process, killing two birds with one stone.
What you’ll need
- Water.
- A plastic bottle.
- 4 clear plastic trays.
- Vegetable oil.
- Feathers.
- Cotton buds.
- A spoon.
- Cotton wool.
What to do
- Pour some water into the plastic bottle.
- Add some vegetable oil and shake.
- Tell the class to observe what happens in the bottle.
- Divide the class into groups and give each group a tray.
- Pour some water into the trays.
- Add 5 spoons of vegetable oil to each tray.
- Use the cotton buds to spread the vegetable oil throughout the surface of the water.
- Tell them to try and clean up the oil from the water using cotton wool.
- Now add some feathers to the tray and tell them to clean up the oil from the feathers.
- Notice how heavy the feathers get.
Takehome
In an oil spill accident as demonstrated by the first part of the experiment, oil floats on water. This in turn blocks sunlight and oxygen from reaching plants and animals in the water.
After shaking vigorously, the oil in the bottle still floats on water due to a difference in densities.
Try using absorbent materials to investigate which one cleans the oil best. Other methods of separation include using a pipette.
When it comes to cleaning the feathers, it is very difficult because the feathers absorb both oil and water. This makes it heavier. This is a classic demonstration of how oil spills affect birds that feed on sea animals.
Fun fact: In the Gulf War of 1991, Iraqi forces discharged around 300 million gallons of oil into the Persian Gulf as part of their attack.
Fossil Fuels vs Renewable Energy
As the world is rapidly gravitating towards finding the best renewable energy sources to suffice our needs, green jobs are becoming a thing.
What better way to steer your child towards a ‘greener’ career than introducing them to this concept at an early age?
This activity introduces the learner to air pollution through a demonstration of its effects on plants– a memory aid to help teach the topic.
And it’s fun and super simple too!
#5. Effects of Acid Rain – Middle School (6th & 7th Grade)
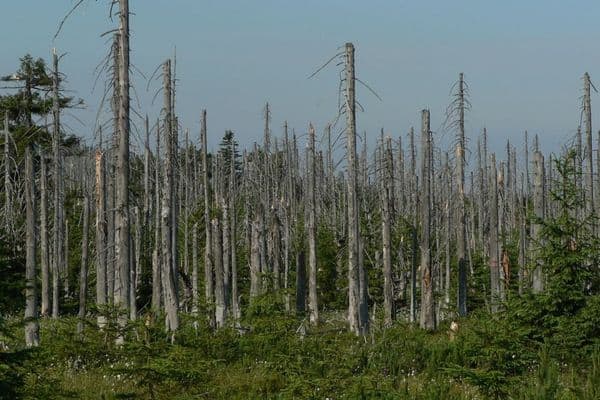
The burning of fossil fuels produces unhealthy hydrocarbons and fumes that have negative effects on our environment. Nitrogen oxides, a by-product of burning fossil fuels lead to the formation of smog and acid rain.
What you’ll need
- Lemons.
- Bean seeds.
- 3 plastic cups.
- Vinegar.
- Water.
What to do
- Put soil halfway through each cup.
- Make holes and plant the bean seeds.
- Add some water and let them germinate.
- After about five days, bring them back to class.
- Pour some clean water into the soil in the first cup.
- Extract juice from the lemon and pour it into the second cup.’
- Pour vinegar into the last cup and let them sit for three days.
Results
The leaves of the plants irrigated with acids start to yellow on the second day. The plant irrigated with vinegar, a stronger acid, may eventually die.
Acid rain dissolves vital nutrients required by plants and affects the soil pH. Depending on the level of pollution, plants affected can start having yellow leaves. This indicates a deficiency in nutrients and minerals.
In addition to contributing to acid rain, decreasing visibility, and altering clouds and the climate, sulfur dioxide in the atmosphere can exacerbate cardiovascular and respiratory diseases.
This is also a good time to slide in on the importance of renewable energy sources and how they can relieve the environment from pollution.
Frequently Asked Questions
What are the 5 major fields of environmental science?
Environmental science has five different fields which are further branched into subcategories. The five fields include Atmospheric science, social sciences, geosciences, environmental chemistry, and oceanography.
What are some good environmental science projects?
Some interesting environmental science activities you can try out include the carbon (IV) oxide absorber core, oil spill experiment, and biodiversity experiment. In case you are looking for a more serious project, you can try making a DIY greywater treatment plant.


