
4 Easy Microscope Activities for the Middle School Classroom
Perhaps you finally have the budget to purchase a few microscopes for your classroom, or you’ve decided to dust off the microscopes that have been sitting unused in the supply closet.
Whatever your situation, you are here because you want to utilize this tool to enrich the learning of your students.
But what are you going to do with those microscopes? Read on for ideas and resources to get you inspired!
Related post: Best Microscope for Kids
Microscope Activities for Middle School (5th-8th Grade)
From learning parts of a microscope and how to use one to observing and identifying the cellular components of a cross-section of a plant stem, there are a number of activities that can enrich the learning experience of middle school students.
1. How Does a Microscope Work?
The first lesson is likely to prepare the students to use and appreciate a microscope.
Guiding Questions/Instructions:
What are the different parts of the microscope?
You can use an unlabelled diagram to help them identify the important microscope components.
How does a microscope work? What are the important components of a microscope? Why does an image appear inverted through the eyepiece of a compound microscope?
You can have students write their names or another word on a piece of paper and observe how the image is reflected through the eyepiece. This will allow you to introduce the topics of illumination and concave lenses.
How do you use a microscope?
Give your students a slide. This can be a root section, salt, sugar, or a piece of onion skin. Walk them through a demo of how to properly illuminate and focus their sample.
During this, you can introduce the concept of field of view, magnification, and more. Teach them how to calculate field of view and the total magnification taking into account both the objective and the eyepiece magnification.
2. Plants vs. Animal Cells
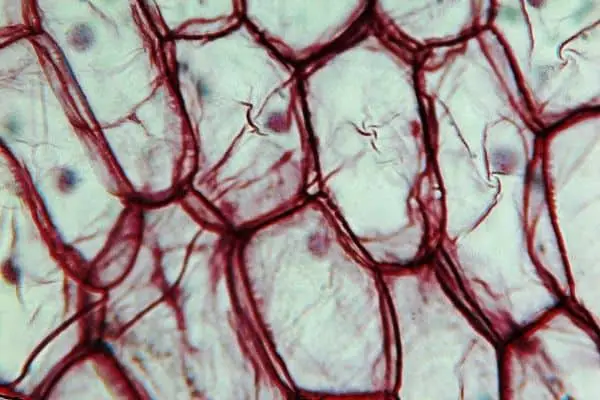
Slides can be purchased or prepared fresh. For freshly prepared slides, onion skin and a cheek swab can easily provide material for this activity. There is a great description of a similar activity here.
Guiding Questions/Instructions:
What differences do you see between the animal cell and the plant cell?
Have your students draw or describe the differences prior to introducing the specific names of the cellular components.
Can you use online or printed resources to identify the different components of each cell?
Why do you think these differences exist? What function do they serve?
3. The ecosystem of a Pond
Is pond water just water?
If you have a pond, creek, or fountain on your school premises, grab a sample or go collect samples with your students. If not, bring in different water samples (ocean water, pond, fish tank, river, creek, water fountain, tap water, etc.).
Guiding Questions/Instructions:
What do you observe?
Have your students draw or describe what they see.
How do the water samples compare? How are they the same? What are the differences?
Can you identify the organisms within those samples using online or printed resources? What purpose might they serve to the larger ecosystem from which the water sample was obtained?
4. Crystal Structures
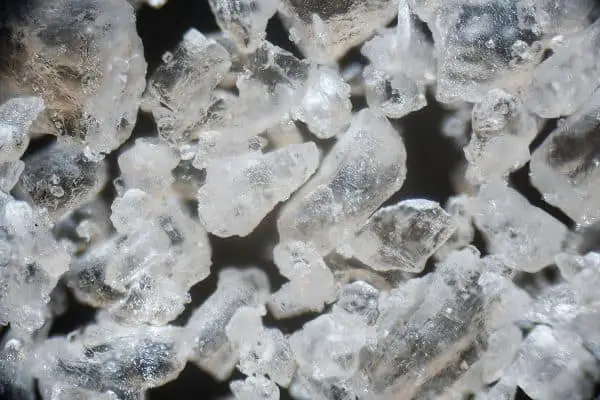
There are a number of household items that could be used or crystals that could be grown for this activity. The simplest samples would be sugar and salt crystals.
Guiding Questions/Instructions:
What differences do you see in structure? Are there size differences?
Draw or describe the structure of the sugar and salt crystals.
What characteristics dictate what a crystal structure looks like? Could you use an online or printed resource to identify these characteristics?
Do you think scientists can predict crystal structures based on the known features of a compound or material? What information would a scientist need to predict the structure?

Once you have chosen your favorite activity and are ready to get started with your students, it is important that you have a plan to assess learning.
What is the #1 skill or concept (or 2 or 3) you want your students to take away from this experience, and how might you best determine whether they have acquired that knowledge? Assessments can be in the form of presentations, quizzes, written reflections, drawings, lab notebook entries, even video or other media content. There are some great examples in the resources section below.
Additional Resources
For more activities, training, and assessment ideas, visit the links below.
Amazing Cells – A Cell Biology Unit for Grades 5-7 (University of Washington)
The Microscopy Society of America has a number of great resources including additional activities, instructions for how to section fresh tissue without a microtome, and free lab notebook templates.
Teachers Pay Teachers is a great resource for free or inexpensive lesson plans prepared by other teachers.
Don’t have microscopes? There are a number of virtual activities available. Check out this one from PBS Learning Media.
Frequently Asked Questions

What type of microscope is best for a middle school classroom?
The best microscope for your classroom will depend on the samples you wish to look at. Generally, a compound microscope with an objective providing at least 100x magnification is required to see individual cells.
For observing smaller cells or cellular components, a higher magnification is necessary. You will also want to consider the light source for your microscopes.
Less expensive options will likely rely on a mirror that reflects the ambient light in the room to illuminate the sample. This sort of microscope may be adequate if your classroom has access to large windows providing ample natural light.
However, the ability to observe your sample may be affected by the time of day, weather, and season. A direct light source will provide better and more consistent illumination but will come with a heftier price tag. Additional microscope characteristics like cordless vs. corded, fine and coarse vs. single focus knob and binocular or monocular eyepieces can be determined by the resources in your classroom, budget, and teacher preference.
How do I prepare microscope slides?
For a wet mount slide, place a very small drop of liquid (water, glycerin, oil, mounting solution) on the slide in which to suspend your sample. Place your sample in the center of the liquid and gently lower a glass coverslip onto the liquid.
Start by touching one edge of the coverslip to the slide and gently lowering the coverslip onto the slide. This will allow bubbles to be pressed out as you lower the coverslip. For a dry mount slide, the specimen or sample is placed directly on the slide without a liquid or coverslip. Videos of how to prepare a slide properly can be found on YouTube.
What can I look at under a microscope?
This list is nearly infinite, but here are some ideas to get your creative juices flowing:
- Onion skin
- Hair (from multiple students)
- Fur (from multiple species)
- Cross section of a plant root or stem
- Salt
- Sand
- Bread mold
- Leaves
- Yeast (bread yeast can be purchased from the grocery store and proofed)
- Insects
- Flower parts
- Sugar
- Moss
- Water from different sources – pond, tap, river, fish tank


