
3 DNA Science Fair Project Ideas (Extract DNA From Plants & Humans!)
DNA may sound like rocket science. But in reality, it’s not all that difficult to extract it from fruits, plants, and even humans!
In fact, there’s a variety of DNA experiments and science fair project ideas suitable for elementary and high-schoolers.
But why would it be an interesting subject for kids?
Starting with the discovery of cells in 1665, to learning how to differentiate organelles in the 1830s, to the discovery of DNA in 1953, people have been curious about what makes things alive.
Recent scientific discoveries have proven that DNA is responsible for almost everything happening in living organisms.
DNA holds the instructions needed for every cell to continue living. DNA instructs the creation of proteins, enzymes, cell respiration, the development of cells, and the overall functioning of the cells, and body.
Besides its programming capabilities, DNA is responsible for generational gene transmission, from blood types, and illnesses to facial features and hair color.
Whether the genes are dominant or recessive, they can be present throughout different generations, dead or alive, and they can be calculated and seen without the need for scientific research.
Related Post: Periodic Table of Elements Project Ideas & Activities (4 Quick & Cool Options)
3 DNA Experiments for All Ages (W/ 3 Types of DNA Extraction)
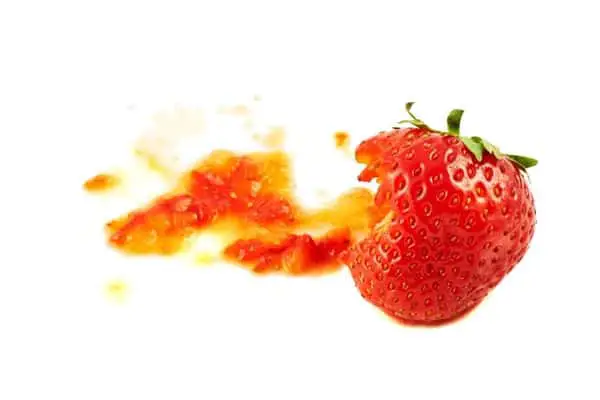
1. DNA Extraction from a Strawberry
Age range: 10+
Throughout history, plant DNA has undergone various changes, some because of climate changes, some because of fraught conditions. As a result of that is that fruits from the same tree/ bush can have a different number of genomes. But in the end, both fruits will look very similar.
Strawberries have very complex DNA. It’s an octoploid type of genome, meaning each cell has 8 copies of its chromosomes. So to be precise, one strawberry has around 35000 different genes. That’s 15000 genomes more than human DNA! Thus, extracting DNA from a strawberry will give you a large number of DNA strands.
It’s scientifically proven that plants have more complex DNA than animals and humans!
Materials Needed:
- 3 Strawberries;
- 3.9oz Ethanol alcohol;
- Measuring cup;
- Tablespoons;
- 1 tbsp. Salt;
- 4oz Distilled water;
- 2 tbsp. Dishwashing liquid;
- 1 Ziploc bag;
- Glass bowl;
- Cheesecloth;
Before experimenting, prepare the following:
- Put the alcohol in the freezer 24 hours before experimenting!
- Prepare an extraction liquid: pour half a cup of distilled water into a glass bowl, and put 1 tablespoon of salt and 2 tablespoons of dishwashing soap. Mix until combined.
Procedure – Part 1: DNA Extraction
- Remove the green parts of the strawberries.
- Put the strawberries in a ziploc bag, and squeeze the air out. Squish the strawberries with your fingers until they become a paste. If you’re facing difficulties when crushing the strawberries in a zip lock bag, you can use a mortar and pestle instead.
- Add 3 tablespoons of the extraction liquid to the ziploc bag. The ratio of strawberries to the extraction liquid should be 1 to 1. So for every strawberry used, use 1 tablespoon of the extraction liquid.
- Close the ziploc bag and squish until the extraction liquid fuses with the strawberries.
- After combining the extraction liquid with the strawberries, pour the mixture into a cheesecloth and squeeze out the excess liquids.
- Pour 3.9 ounces of the cold rubbing alcohol into a glass or plastic cup.
- Pour the squeezed strawberries into the cup with the alcohol in it.
- Swirl around the cup until the strawberries disintegrate into the alcohol. There should be a white residue floating in the cup. That’s the DNA right there!
- With a wooden stick collect the residue and put it into a Petri dish.
Part 2: Under the Microscope
Set up a microscope with a magnification of 40X. Use the closest alternative if your microscope does not provide a magnification choice of 40X. The chromosomes found in strawberry DNA may be seen under 40X magnification.
It’s easy to explore new methods and modifications for this experiment.
You can try using different fruits, while strawberries are one of the squishiest fruits, you can swap them with many other fruits like kiwis, bananas, other berries like raspberries and blackberries, and even onions would work perfectly. The squishier fruit the better the DNA extraction!
The whole squeezing process can be done in many ways: you can use a clean mortar and pestle instead of a ziplock bag, or if you want to finish the experiment as fast as possible try using a blender. The downside of using a blender is that it pulverizes the strawberries, and it will cut the DNA into smaller strands.
If you want to bring it up a notch, you can extract the DNAs of every fruit mentioned above and compare the achieved results.
Another additional step you can add to this experiment is staining the DNA for more visible results. The best DNA stains for fruit DNA are Methylene Blue, Crystal Violet, or Ethidium Bromide.
If you’re doing this experiment without supervision, avoid using Ethidium Bromide. It requires supervision and strict safety measures. It’s a dangerous mutagen, it’s easily absorbed and it can cause serious genetic mutations.
On the other hand, the staining results from Ethidium Bromide are quite fascinating, and even though it has a dangerous nature it’s still being used in laboratories worldwide.
So, if you plan on using it, make sure to wear a lab coat, gloves, glasses, and a face mask, and follow your laboratory’s safety guidelines.
To sum up, this experiment is adequate for all ages and is especially fascinating to little future scientists. It’s an educational blend of biology, chemistry, and most importantly entertainment.
2. Extract Your DNA
Age range: 13+
In comparison with other DNAs, human DNA is surprisingly easy to understand. Human DNA strands are made out of deoxyribose sugars, and phosphate groups, which are closely connected with a covalent bond. They have a specific backbone order and have a specific pair of bases connected to them.
Every deoxyribose sugar is connected with a nitrogenous base, and they help with DNA and RNA replication. And there are 4 bases: A – adenine, C- Cytosine, G- Guanine, and T- Thymine. Each of them has a different function, and a different pair. Adenine pairs with Thymine, and Guanine pairs with Cytosine. When you bind the strands and base pairs they give DNA its functions, and form.
DNA can be extracted from every cell in the body, and most laboratories use blood samples, body fluids, hair cells, and tissues. This experiment is a simplified process where you can extract your DNA, without any specific laboratory formalities or dangerous chemical substances.
Materials Needed:
- Sample tubes;
- Salt;
- Distilled water;
- Dishwashing liquid;
- A few toothpicks/ wooden screws;
- Weight;
- Measuring spoons;
- Ethanol alcohol;
Additional Laboratory Materials for Further DNA Examination
- Petri dish;
- Microscope;
- Microscope glass slides;
Preparation:
- Put the alcohol in the freezer 24 hours before conducting the experiment.
- Prepare a saline solution: In a small, clean glass pour 2oz distilled water and ¼ teaspoon of salt. Mix until the salt disperses into the water.
- Prepare an extraction liquid: pour ½ oz of distilled water and 3 drops of dishwashing liquid into a glass. Mix it until the dishwashing liquid is completely dissolved.
- Clean and prepare the measuring cups, spoons, and glasses.
Procedure – Part 1: Getting to the DNA

- Using some warm water, clean your mouth. Make sure there is no residue on your teeth, gums, under the tongue, and around the cheeks.
- Massage the inside of your mouth with your tongue. Go around your teeth, gums, and cheeks. This will loosen the cells in your mouth, making the DNA easier to extract.
- Take a sip of the saline solution and swirl it around your mouth for 2 minutes.
- Spit out the solution in a clean glass.
Part 2: Under the Microscope
- Prepare a clean glass and pour 3oz of alcohol into it.
- In the same glass pour a tablespoon of the extraction liquid. And mix until combined.
- Slowly pour the saline solution into the glass with alcohol in it. DNA is soluble in water but not in alcohol.
- Swirl around the glass until a white precipitate of DNA starts forming on the top.
- With a wooden screw collect the DNA and place it on a microscope glass slide.
- Prepare a microscope with a magnification of 40X. If your microscope does not have a magnification setting of 40X, choose the next best option. Under 40X magnification, the chromosomes contained in DNA may be best observed.
You can modify this experiment by changing the ingredients: instead of Ethanol alcohol, try using Isopropyl alcohol or denatured alcohol.
Another simple alteration is temperature, the freezing points of the liquids used in this experiment are very diverse, alcohol has a freezing point of -174.6 degrees Fahrenheit (-114.1 degrees Celsius), and water has a freezing point of 32 degrees Fahrenheit (0 degrees Celsius).
By changing the temperature of the water and alcohol, you can find the best final temperature suitable for the DNA extractions. Therefore, you can put the bottle of alcohol in the freezer for 2 hours, 12 hours, or even a few days.
You can repeat the experiment until you find the temperature that gives you a large quantity of DNA precipitates.
As previously mentioned, you can also stain the DNA for more colorful results.
Another addition to this experiment is using a Petri dish, with an agarose base to grow cultures of bacteria. With this, you can see what bacterial cultures are present in your saliva.
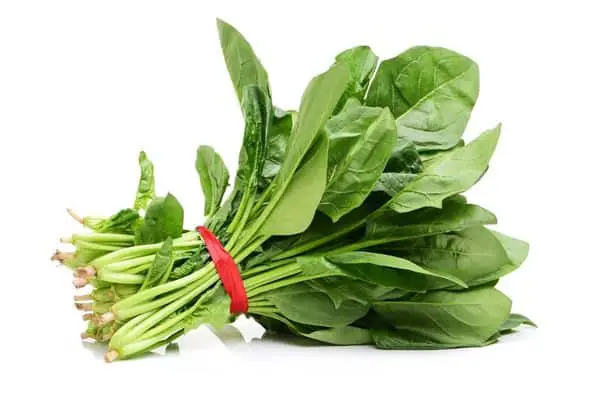
3. Extracting DNA From Plants Leaves
Age range: 10+
DNA from leaves has a similar structure to DNA from fruits.
The difference is that green leaf cells have different structures and different organelles which contain fewer types of DNA than fruit cells.
Fruit cells have different types of plastids which all have different DNAs, and have different structures, forms, and uses. Thus the DNA extracted from fruits isn’t as clean as the DNA extracted from leaves.
Green leaf cells contain a wide layer of chloroplasts, they contain DNA that’s different from the DNA present in the nucleus of the cells. The DNA in chloroplasts is easy to break down and easy to extract.
This experiment focuses on extracting a cleaner but a smaller amount of DNA.
Materials Needed:
- 4oz spinach leaves;
- 1 tablespoon of salt;
- 3oz distilled water;
- Ethanol alcohol;
- Glass cup;
- Measuring spoons;
- Blender/ Mortar and pestle;
- Toothpick/ wooden screw;
Preparation:
- Put the alcohol in a freezer 24 hours in advance.
- Put the water in the fridge 12 hours before conducting the experiment.
- Clean the equipment that will be used in the experiment for better results.
Procedure:
- In a blender, put 4oz of spinach leaves, 1 tablespoon of salt, and 3oz cold, distilled water. Blend until the leaves get liquified.
- After blending the leaves, pour them into a glass cup, and add a teaspoon of dishwashing liquid. Mix until the dishwashing liquid breaks down.
- Add 3oz of cold, ethanol alcohol into the cup with the leaves.
- Swirl the glass until white gelatinous precipitates form at the top of the solution.
- Collect the precipitate with a toothpick or a wooden screw, and place it on a glass slide for further examination.
You can substitute the types of leaves used. Any plant with moderately sized green leaves will work. You can change the spinach leaves with basil, swiss chard, lettuce, salad, or leaves from flowers you can find in your garden.
You can use a mortar and pestle instead of a blender, it’s more time-consuming but it will give you the same results as a blender.
Furthermore, you can stain the DNA with different types of fluorescent stains, after staining, the DNA sample will have a more prominent look.
The best DNA stains for plant DNA are ruthenium-based stains, such as the aforementioned Methylene Blue, Crystal Violet, or Ethidium Bromide.
Avoid using Ethidium Bromide if you are conducting this experiment without supervision. It needs close monitoring and stringent safety precautions. It is a hazardous mutagen that is quickly absorbed and can result in significant genetic changes.
Frequently Asked Questions
Which fruits and vegetables are the best for DNA extractions at home?
The best types of fruits and vegetables for DNA extractions are mushier fruits and vegetables like strawberries, raspberries, and overall all berries, plums, kiwis, bananas, mangoes, and onions.
DNA can be extracted from other fruits and vegetables like apples, pears, plums, carrots, beets, potatoes, and lettuce.
The downside of using stiffer fruits and vegetables is that they need more preparation and they are harder to mash.
Why do you need to use dishwashing soap when extracting DNA?
Dishwashing soap, shower gels, and other cleaning liquids with Sodium chloride in them help with dissolving the lipid cell membranes and the proteins present in cells.
Sodium Chloride breaks down any proteins, and enzymes bound to the DNA strands and it helps with achieving cleaner results.
When combined with water, and alcohol, the dishwashing liquid prevents the dissolved materials from mixing with DNA.
Which type of alcohol is best for DNA extractions?
The best types of alcohol for DNA extractions are 95% Ethanol or Isopropyl alcohol.
Cold Ethanol alcohol should be used when the DNA sample contains a higher concentration of DNA. The temperature and consistency of Ethanol will help with the formation of DNA precipitates.
When the DNA concentration is lower, use Isopropyl alcohol. It doesn’t separate the proteins present in DNA, therefore the amount of precipitates is bigger but the result is cloudier DNA.
Other types of alcohol may cause cloudy results, so they aren’t useful in DNA extractions.


